2015-03-30

DIY BABY TOYS |Tutorial|

I've been MIA lately. It's not that I haven't been sewing, in fact I have done a lot, I just haven't been blogging. I am trying to get back to it slowly though, and just to kick off I am bringing home a guest post from last year. Enjoy!


Hello Sew McCool readers. My name is Magda E. and I blog over House of Estrela. Today I am here to show you how to make a baby toy on your own. I have to tell you though, that I made a commitment with myself, I will not buy any fabrics or other supplies because I have too many already... well, actually, after a couple of years sewing from what I have, my stash is quite smaller now. so, everytime I make something, I use from what I already have. For this one, I have used a scrap from a baby shirt and a small stuffed dog (we got years ago from a very well known fast food chain). 


If you have any fury fabric, that would look good. I had this one and a plain white one as choices, but I went for this one, because I think the contrast would be more interesting for my baby. It is a very quick sew, you don't even need a sewing machine. I handstitched mine too. And here's how I made it:


You can use any animals you'd like. The rectangle for the tube is folded in the photo. 


I didn't, but you can also include a rattle within the filling to make it even more sensorial for the baby. 


And we're so close to finish! This is a great quick and easy last minute gift because you can make in a few minutes. Or you can make a few of these, with different animals and tell a story to your little one with them. If your baby can hold objects already, this is a perfect one. 


I hope you've enjoyed it! If you'd like to see lots of refashioned/recycled projects visit my blog
Magda E. 

2015-03-19

Holiday Cutout Dress & Top |Pattern Tour|


Today I am happy to be part of the Holiday Cutout Dress and Top Pattern Tour. The very first tour for the designer Melissa Prendergast from Bella Sunshine Designs, and in my daughter's opinion this was one of the most fun things I made her recently. So I guess it was very much approved. 


I think the idea behind this pattern's design was really good. A simple and easy to make top or dress, that can become quite unique and so appropriate for the different holidays that we have through the year thanks to the feature of 6 different cut outs to make your holiday outfits shine bright. Each one of them comes in different sizes and there are instruction to use them as appliqués instead of cut outs. Check the other ladies in the tour (below) to get some good inspiration. 


It was really easy for me to chose the cut out I wanted to use. You see, my last name, Estrela, means star, mixing it with the hubby's, my kids got "brave star" as surnames. I couldn't find a better partner to name my kids I guess, because they truly are my brave stars, especially G., my little girl, after all we struggled while trying to concieve. More than a brave star, she was really our little miracle. Anyway, she will be four in a few months, and only three days after, her little brother will be one, and yes we are thinking about their birthday party already. We were unsure between the rainbow and stars as the theme, and since we hadn't decided yet when I sewed this, I went with the star cut out. This might be the trickiest cut out to sew because of all the corners, but there are easier ones that even begginers will be able to sew. 
Later she told us she'd prefer a rainbow party, but I guess I won't resist squeezing a few stars to the theme... 


I used one more of the fabrics I got from my friend Maria. Is it appropriate or what? And it is red! I so love red. Curious fact - apart from last year's, I've always make something red for my daughter for her birthday parties, and it was not planed to be like that. I usually make my own bias, but I was really lazy to do so this time and had to leave half way through my sewing process to buy it. I was so happy to find the red from the bias was exactly the same shade of red in the fabric. Couldn't be better. 


This is clearly a pattern for girls, starting at size 12m up to s10, labeled as confident beginner. And it comes with print by layers option, which is great. 

There's a coupon code for 20% off for the Holiday Cutout Pattern during the tour, so you don't have that long to get yours at a lower price, tomorrow is the last day. 

Not convinced yet? Visit these ladies and you will be (click on the day)... 
Day 1: Rebel & Malice - Clever Catastrophe
Day 2: The Berry Bunch - Amanda Rose
Day 3: Candice Ayala - Keep Calm & Carrion - Felt With Love Designs
Day 4: Create 3.5 - Young Whimsy
Day 5: House of Estrela - Huckleberry Love
Day 6: From A Box - Lulu & Celeste

I got this pattern for free but all opinions are my own.

2015-03-13

Baby Shower

Today is going to be a happy day. 

We'll be making a friend cry, but in a good way, I promise. It is a surprise baby shower for Patrícia. She is such a sweet, attentive, loving and generous person. Remember our last group post, when we all shared the things we made for charity? Then you might also remember that she was the one that got us all sewing those things. Our dear friend is expecting her second child, another girl. We couldn't have it any other way, so get ready to see all the goodies everyone made, not only for the little princess but also for her bigger sister, because bigger sisters deserve some extra love too.


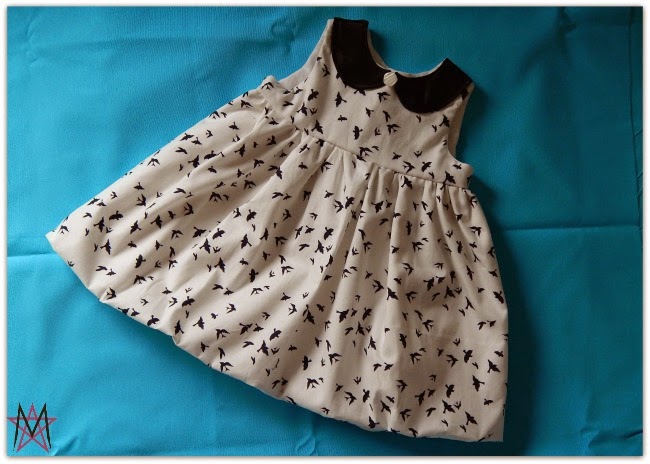
Let me start with the little one. And the little secret I have been hiding from you. Back to KCW in February, I told you I had started two little dresses. I didn't show them back there, because they were both gifts for friends that read this blog. They were both Geraniums. I shared the first one 
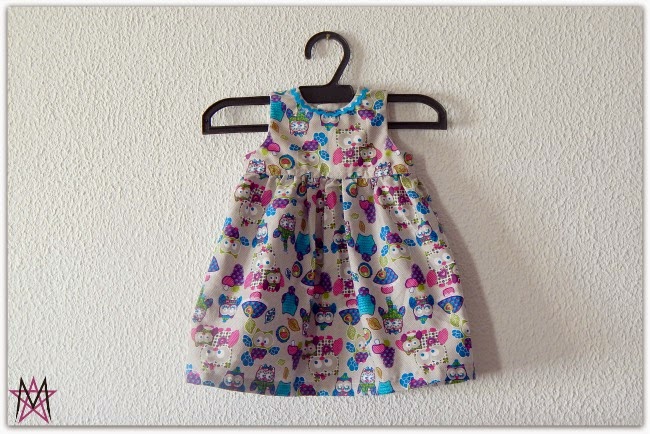
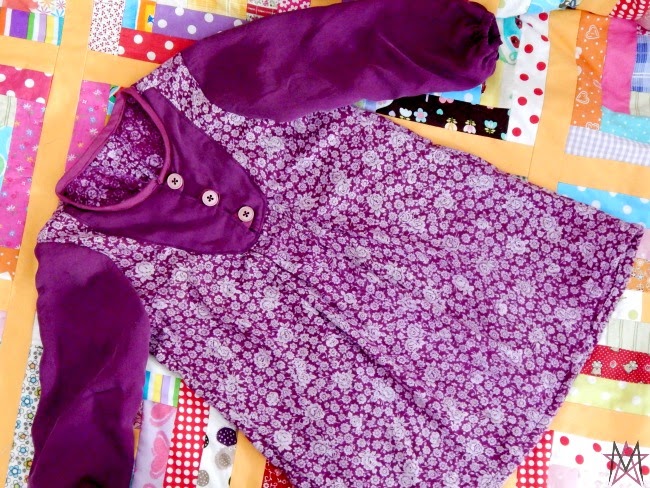
here, and today I can finally show you the second one. If I kept it more neutral for the first one, for the second I went all colourful, because Patrícia is someone who brings color and positive feelings to me. And I wanted that for her little one too. 


I used this scrap of fabric I bought last year. It was one of the few fabrics I got into my stash, one of those to use in very special projects. I figured a new born would be a good excuse to use it, and so I did. for the lining I used a scrap of a white cotton sheet, I always have them for these little projects.

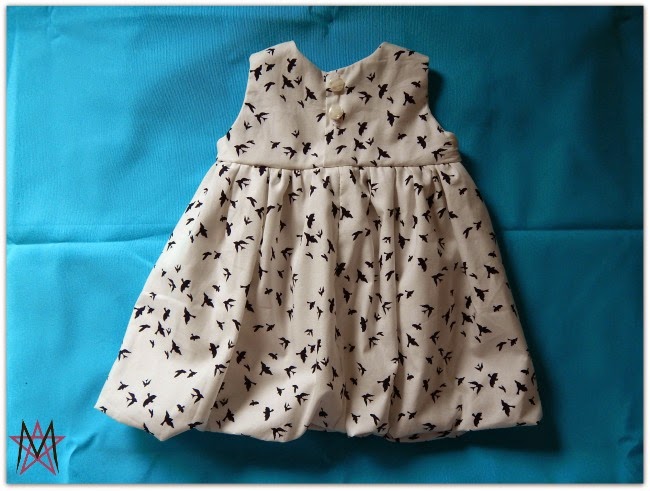
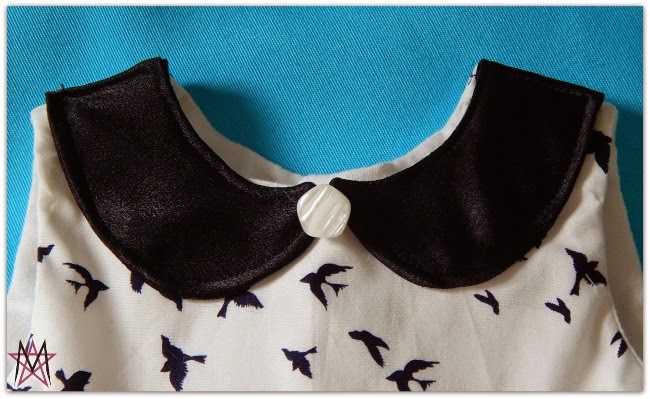
I skipped pockets in this one too. And the only details I added was the blue ric rac on the collar. I used snaps to close the dress on the back. I wasn't sure if I'd use the pink or blue (like the ric rac), but the blue kinda died next to the owls, and a princess is a princess, so pink it is. I actually though about using velcro tape (nastra tape?!), but I got my new pliers just in time for the snaps. They are perfect to use in babies clothes.


Because it was a newborn dress, I wanted to be extra careful with the seams, so no seam is showing unfinished in this dress. I could have tuckled the waist seam under the bodice, but I forgot... yes, I forget... and because I was lazy to unpick it, I had to come up with a different solution, so I covered the seam, sewing a cotton tape over it. Hence the two rows of stitches in the waist. The bodice was lined so I didn't have any special cares with the seams, but when it comes to the skirt, I used french seams. I finished the skirt with a regular hem.


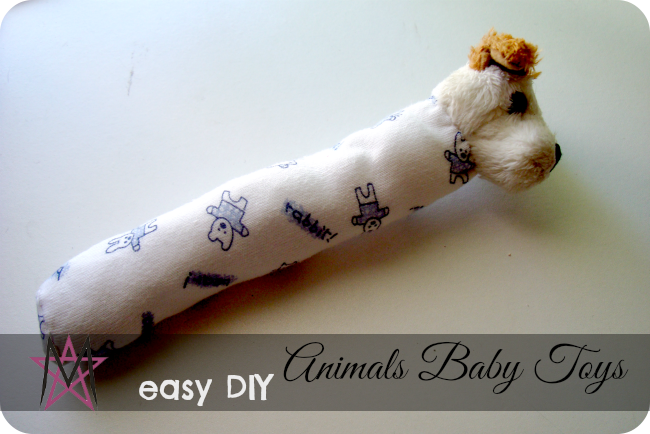
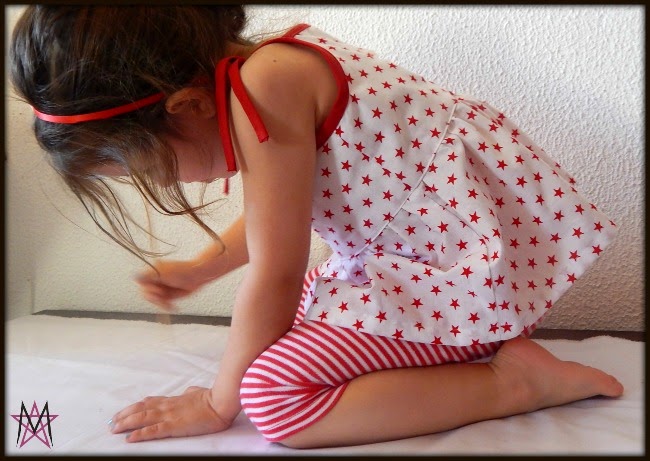
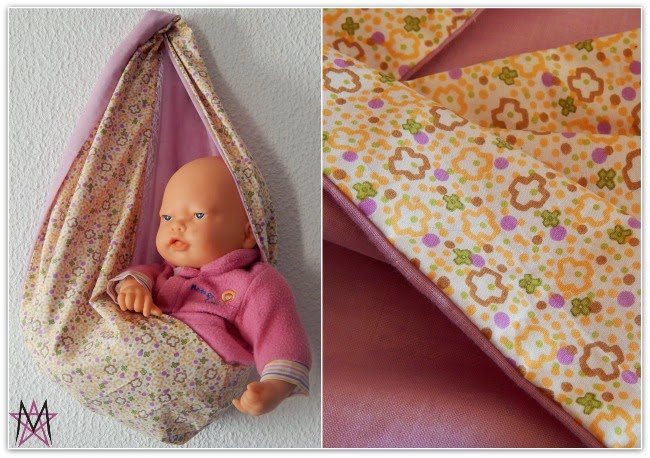
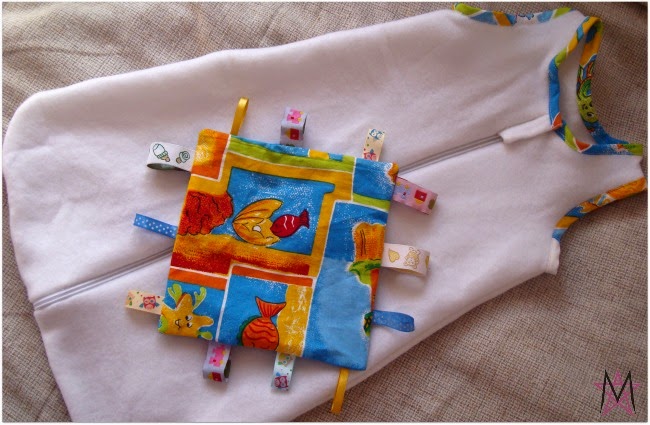
And now that I've said all I had to say about the little one's dress, let's move on into the big sister's gift. I made her a baby doll pocket sling. Just like the ones I make for real mammas, but in a kids size, of course. This idea actually came from my G. She loves to wear her baby just like I wear her brother. She feels so happy and proud when we are both walking our babies in a sunny day. I figured, what little girl wouldn't feel that?! And I knew Patrícia was looking to get herself some sort of carrier too, so it'd make perfect sense.

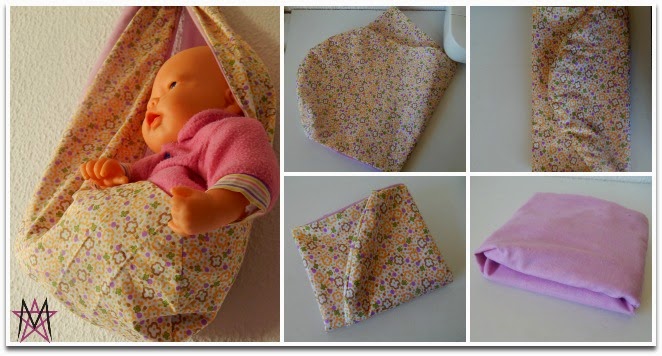
pictures show a great way to fold the slings (even the adult ones) to keep them clean in your bag. 
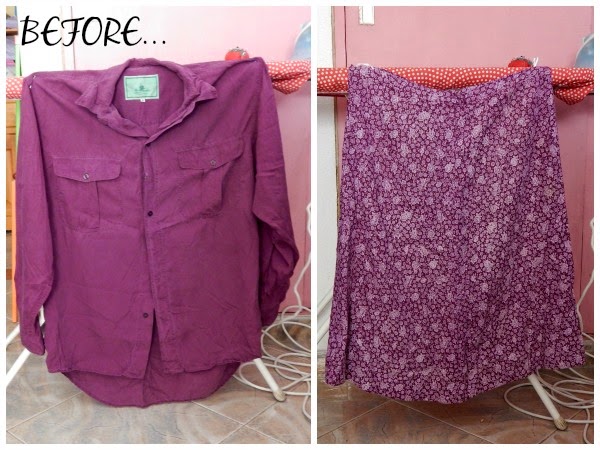
I used my daughter's measurments to make it (because I actually made her one too, we were using an improvised one). Although my G. is a bit older, I am pretty sure this might be close to C.'s size too (crossing my fingers). I used a piece of a very light cotton as the "lining" (it is reversible), it was originally white but I dyed it long ago, it is the same fabric I used for G.'s Bubblelicious romper, does that ring a bell? As the outer fabric, I used a vintage piece that I got from my grandmother. This screamed Patrícia to me, I hope I wasn't wrong, but most of all, I hope that C. approves it!


Baby doll courtesy of my daughter. His name is Captain Hook... yes, she said it is a HE and yes, that's the name she chose!!!

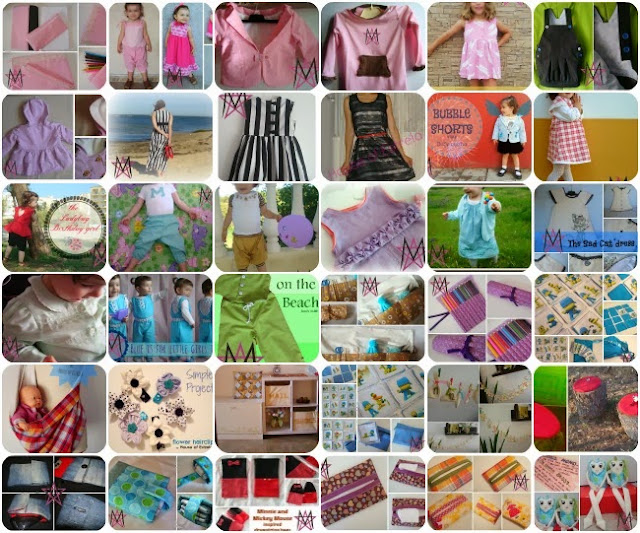
Now, don't forget to check what the other nice ladies made for this virtual baby shower. You will love it all, I can tell you.


Patrícia... because YOU deserve all the love you can get, I hope you liked our little surprise. I'm sorry that now you'll have to wait to recieve all these goodies. I hope you're not crying too much. 
Love you my dear, might S. come at her time, bringing joy, light and laughter to your family. 

2015-03-11

My first Geranium

Now that I know my friend has recieved it, I am already free to blog about one of the cutest little dresses I've made lately, without spoiling the surprise. A little Geranium, newborn size for my friend's baby girl. 


This pattern was on my to do list for quite a while, but because I only have the free version, I had to wait until I had a newborn girl to sew it for. I was so happy when I knew my friend A. was having a daughter, I knew I'd be making this one for her. 


So, baby L. is born and over a month old already. How come?! And I'm so sad they live so far, I won't be able to see her wearing this. But I hope she wears it (she's big!!). I made the pattern my own and didn't even look at the instructions, so please don't ask me feedback on that. I really only used the pattern pieces. I've added a peter pan collar, well, actually I've appliqué it. It's a fake collar, sewn into the dress, only in the front. I added a vintage button in the middle (I know her mommy would appreciate the vintage look!). These buttons, came from a thrift market and I've been saving them for a special piece. Here they are now. 


I skipped the pockets on my own. And fully lined the dress. Instead of a regular hem I decided to make it a little bubble and I couldn't be happier about it. 


The dress closes at the back with two of the same buttons I used in the front. Don't you just love this fabric? I know I do. It was part of a box full of goodies that I got from sweet Maria around Christmas time. I still have a little left. Wondering what I can use it for, but I know I'll find something special, sooner or later. 

2015-03-06

Around the World Blog Hop


My dear friend Patrícia from Pequeno Mundo a 3, invited me to be part of the blog hop nearly a month ago. I was so busy back then, and then got so distracted that I haven't posted it until today. This reminds me, that many  many months ago (August?!), Pam from Threading My Way had also contacted me to take part of a blog hop, but although I said yes, I never did! Bad bad girl! =(


Anyway, Patrícia has became a great friend in the last couple of month, I am sure you'll love her blog full of beautiful photos, sewing projects, and a lot of love. Pam is already well known here in this little blog of mine, right? She's a great refashionista and a very giving person. Thank you both for thinking of me. 


I am supposed to answer a few questions, so here we go... 

What am I working on?
At this moment I have a few things going on. I am finishing two baby doll acessories but I can't tell much about it yet, I need to add buttons to a dress and I just printed a new pattern for a tour. 


How does my work differ from others in its genre?
I don't know really. I don't look at my work as something very different or original. I refashion, that's what I do, what I like to do. Maybe that's the main thing that differs from others.


Why do I create what I do?
I've started sewing for myself because I couldn't afford the expensive corset and fancy fabric clothes I loved so much. Then it just grew on me. When I became a mother I discovered a new world inside the sewing world I was already so attached to. I sew for my kids because I love to as a start. But it also helps me to save and keep my sanity since I became a SAHM.


How does my creative process work?
If often starts with a pattern or a piece or fabric (usually clothes from my refashioning pile). I usually start from there and usually grows (the idea, details, etc) as I go.

Now I should nominee two bloggers and they are....
Diana from Miss Castelinhos
because I'd love to get to know them better! ;)

2015-03-03

Charity Sewing


Scroll down for english

Eu sei que já estamos em Março, e eu aqui vou-vos falar do Natal, mas acreditem que é por uma boa causa. Há já alguns anos que, por essa altura, escolho, pelo menos, um projeto solidário do qual possa parte com as costuras. O sentimento de dar a quem mais precisa é uma das melhores experiências de sempre. No último Natal, antes ainda de eu ter procurado por algum projeto a decorrer, a minha amiga Patrícia propôs-me a mim e a mais algumas amigas, costurarmos para os meninos e mães da instituição Mom's & Kids. Esta instituição particular, visa apoiar o núcleo familiar, e com capacidade para 16 utentes, acolhe mães e filhos e ajuda-os/guia-os numa reintegração social. Fomos várias as bloggers (visitar links abaixo) a participar desta iniciativa e reunimos hoje em posts, não só para partilhar o que fizemos para oferecer a esses meninos e suas mães, mas principalmente para divulgar a instituição. Não deixem de visitar o site da instituição, ou a sua página do facebook, e se puderem ajudar, não se acanhem. 
Quanto à minha doação, eu fiz para o mais pequenino da casa. O S. partilha o 1º e último nome com o meu filho e é apenas dois meses mais novo. Claro que fiquei mais sensibilizada a fazer uma prenda para esse menino. Escolhi fazer um saquinho para dormir quentinho, um brinquedo de pano e um par de sapatos, no entanto, estes últimos não saíram bem à primeira e fiquei sem tempo para fazer outro par =(. Comprei uma manta polar para usar no saco. A escolha de cores não era nenhuma e teve de ser mesmo branco, por isso dei-lhe cor nos detalhes do viés feito em casa. O molde foi de uma revista que tinha comprado havia pouco tempo e não vinha em tamanho real, por isso tive que o aumentar por minha conta. O brinquedo de pano tinha que ir também. Com cores vivas de um lado e azul do outo, tem ainda no interior um plástico fino e resistente (até a lavagens) que faz barulho quando manuseado. A G. também teve um e adorava. O S. herdou o da mana e também gosta imenso. 


I know this is March already, and I am about to bring Christmas talking back, but believe me, it is for a good cause. For a few years now, I have made a commitment to be part of, at least, a charity sewing challenge around Christmas time.  The feeling of giving to someone that needs it (whatever it is), is one of the greatest you can ever experience. Last Christmas before I searched for any charity project going on, my friend Patrícia, comes with this idea of sewing for the charity institution Mom's & Kids and a few of us followed. The reason why this post is written in Portuguese as well is simple. We bloggers that made the items to give them, are rounding up today, sharing our makes,  in order to try to help this Charity Institution to reach more people. 
I made a sleep sack and a blanket (a pair of shoes was also on the plans but didn't happen) for the youngest kid in there. His first and last name are the same as my own son't and he's only two months younger, so I felt connected to him easier. I bought a fleece blanket o upcycle into this, and used trong colours as a constrast fabric. The little blanket has a plastic inspide that makes noise. My own kids had one of these and they absolutely loved it. 


Visit...
:: Pequeno Mundo a 3 :: Conversas de Hermanas :: Do Guincho :: Sew Happy :: Fairies, Bubbles & Co :: S. is for Sewing :: Made by Sara :: Saídos da Concha :: Rita Pirolita (infelizmente a Carla não conseguiu escrever um post sobre isto porque perdeu as fotografias do casaco que fez) ::

2015-03-01

Mara Blouse |Dress|


A couple of months ago I was contacted by Marte, the designer from the pattern line Compagnie M. She was the sweetest, allowing me to pick one from all her patterns, not asking anything in return, apart from blogging about the result. That's a fair trade I believe, and picking one pattern, well, that was the hardest part of the deal. I chose the Mara Blouse after all. I had seen so many, and a few of my blogging friends said only good things about it, so I wanted to give it a try.


It was KCW when I cut the pieces for this, and the theme was upcycle, so, pretty much what I usually do anyway. I used a man's button up shirt and a woman's XL shirt. I was donated the first and bougth the second in the thrift shop. You might recognise it from this post. The Mara Blouse starts at size 1 and goes up to size 10, it comes with four different sleeve options (sleeveless, butterfly, flutter or long sleeves - this one was my choice, it is finished with an elastic through the hem), and has two tutorials included to help you turn it into a dress. I made a dress too, I just lenghtened the pattern a few inches to make it fit my daughter. The overall fit of this couldn't be better, I was surprisely happy to see how good, and fitted it looked on G. She's slim, and usually clothes (even rtw) don't fit her that perfectly. I picked the size (3) according to her meauremnts, by the way.


This pattern as a touch of vintage and a few darling features, such as the pleats on front, the buttons on the front yoke, and the tutorial has also instructions to add pipping or other trims to that front panel - I skipped that step for pure lazyness, but it is something to try once I use this pattern again. 


Because I refashioned a skirt that had a lot of seams, my dress has center front and back seams, but the pattern is made from a folded piece for each one of these. Also, the shirt fabric and the skirt fabric were different and one would slightly stretch, I blame it on that when I see my yoke's imperfections. The collar is finished with a bias tape, it was ready made because I didn't have enough to make it with the matching fabric from the skirt. The buttons were in my stash, and they were saved from something else I deconstructed a while ago. 


It was approved by the wearer. She picked the boots to wear with it and she said she loved them with her new dress. Daddy took photos of her, but it was hard, believe me. We decided we don't want to bother her so much with the photos anymore, so we shoot as she runs and plays and jumps, and that isn't quite the easiest way to get good photos, but as a friend told me not long ago, I am not selling anything here, just trying to share something I made out of love. 


Labels

About us Acessories Adult Adults Advent Calendar Appliqué Baby Baby Acessories Baby Doll Acessories Baby Doll Sling Baby Shoes Back Warmer Pillow Backpack Bags Barbie Beading Beads Bedsheets Beret Bibs Bikini Blankets Blazer Bleached Blog Tour Blogs Blouse Bolero Book Covers Book Review Boots Bowling Game Boxers Boy Bracelet Bralette Breastfeeding Pillows Briefs Button Shirt Button Up Shirt Cap Cardigan Carnival Causes Cell Phone Stand Challenge Create Charger Support Chevron Christmas Clutch Coats Commitments Constant Change Contests cookies Corset Cose+ Costumes Cowl CraftingCon Crochet Crossstitching Cushions Dance Outfit dashiki Dia de Los Muertos Diaper Pouch Doll Clothes Dolls Drawstring Bags Dreamcatcher Dress Duvet Cover e-book E-Zine Review Easter Embroidery EnglishPaperPiecing Fabric Baskets Fabric Chess Game Fabric dolls Fabric Flowers Fabric Games Fabric Memory Games Fabric Printing Fabric Stash Fabric Three in a Row Game Fabric Toys Features Felt Flamenco Dress Flamenco pants Food Free PDF Pattern Fun Cakes Funny Fur Gifts Girl Giveaway Glasses Case Granny Squares Guest Posting Hair Clips Hair Clips Hanger Halloween Hand Warmer Pillows handbag Handmade Cards Harem Headband Henley Highlow Home Homemade Liquid Soap Hoodie How to Inspiration Jackets Japanese Sewing jeans Joggers Jumper KCW Keyring Kid's Choice Series Kid's Crafts Kimono Kleenex Purse Pouch knitting Knock it Off Leather lederhosen Leg Warmers Leggings lunchbag Maratón Telaria MashUp Series Maternity MeMadeMay; Men Mending Challenge Mini-Sofa Cover Mobile Mobile bag Mom's Monthly Wrap Up Needle Rolls Nightgown No Sew Nursery One Thimble Onesies Operation: Project 0$ Other Crafts Ottobre Overalls Pajamas Pants Paper Crafts Party Favours Party Time Patchwork Pattern Pattern Testing Pattern Tour Pear Puff Seat Pencil Case Pencil Rolls Peplum Peques de Cine Peter Pan Collar Pijamas Pillow Covers Pillows Piñata Cake Pinterest Challenge Pipe Cleaner Crafts Placket Pockets Plastic bags Dispenser Pleats Pocket Slings Podcast Pompoms Pouch Practising ´n Improving Project Run and Play Project Sewn Projects Pt Refashion Week Quilting Recipes Recycled Ribbon Organizer Recycling Refashion Month 2012 Refashion Month 2013 Refashion Month 2014 Refashion Month 2014 (2) Refashion Month 2015 Refashion Month 2016 Refashion Runway Refashioning Retro Reverse applique Reviews Ribbon Roses Robe Romper Romper Dress Romper Week Roots Round up Rucksack Saving Series Saving while Sewing Savings Made By Sewing Scarf ScrapsBusting Sequins Sew 20's Sew Along Sew Geeky Sew In Tune Sew-a-bration of Womanhood Sew-vivor Sewing Tips Shirt Shorts Skirt Skort Sleep Sack Slings Slippers Snowflakes & Lace Sock Monkey Socks Stitching Suit Surprise Sweater sweatshirt Swimsuit swimwear T-shirt The Hearties The Sew Off Thrift shopping Tights Tips Tissue Case Toddler Top Top 12 of 2012 Top 5 of 2013 Top 5 of 2014 TOP 5 of 2015 top 5 of 2017 Top Stitchers Trousers TSNEM Tunic Tutorial Tutu underpants Underwear Upcycling Vest Videos Vintage waistbag Wallet When things go wrong WIP Women Wreath Year Wrap Up

Cose +

Cose +
Magazine de Costura em Poruguês