Showing posts with label Upcycling. Show all posts

2020-10-25

Suco by Susana's new pattern |Sagres Pants & Shorts|


My friend Susuana, by Suco by Susana has a new pattern out there, it is the Sagres pattern, in her words "a relaxed fit pants or shorts designed for woven fabrics, with elastic waist and no zip or closures for easy getting dressed". This was originally designed to be part of One Thimble magazine, and you can now find it in her shop. 


Again, I was lucky to be part of Susana's testers group and I really enjoyed making these. Actually I made a pair of pants too, but they turned out too baggy on my skinny boy, they will fit later though, so hopefully, I will remember to take some photos and share them with you. 


The shorts fitted pretty well though, and he got to wear them quite a few times until the weather got cold enough to set them apart - for now. Because of the elastic waist, I am sure they will still fit next summer and he'll be able to still enjoy his cute shorts. 


I failed to photograph the before, but this was a chambray men's button up shirt that I refashioned into the boy's shorts. I used a much darker thread while sewing to achieve some contrast and try to make this even more interesting. As always, I love to sew with Susana's patterns, she's very professional in her work, and her finishing details stand out. If you were to ask me for a single designer to recomend you, I'll surely point her out. Her designs are actually day-to-day pieces, the kind my kids wear the most. Check her blog out, for more pants and shorts inspiration (boys and girls). 

2020-09-18

Ginger Shorts |Liola Patterns|


Back in April, as I had to stay home I got to sew a lot, especially for the kids. I blogged about most things already, but since I am not as good at blogging my creations as I was a few years ago, I failed to share one of the things I made as being part of a pattern test, and turned out to be one of the things my kiddo used the most. These are my final version of the Ginger Shorts, a pattern from Liola Patterns.


This is a straight size 5 on my boy. I haven't done another pair yet, and I am not one to repeat the same patterns over and over, but I see myself sewing at least another pair when the weather starts to warm up again next year (because we are going into Autumn right now, around here). 


He wore these quite often, because they are comfy and easy to put on and off with an elastic waistband, which is a must for my lazy boy, and being a breeze to sew, with a different finished touch, they are a good pick for me too, because I get to cloth my child in a blink, and we're both happy. 


We both love the original design for the pocket shape, and it is of course, what makes this different than just a pair of simple, plain shorts. You can also style this shorts by adding trim or piping to the seams, but I skipped that option. 


This is a good pattern to use when you want to use up some scraps, or refashion a piece that is too small to refashion, because you can play around with the different pattern pieces and mix and match a couple fabric options. 

In my case, I chose to refashion a women's mini pencil skirt, but - there you go - the fabric I could use from it, was not enough for the entire shorts, so I picked this cotton one I had recently purchased, which has two different sides to it, and used the plain one as contrast in the pockets area. 


❤️ I couldn't love this goofy face more than I do ❤️

2020-05-10

Natsu Shorts |Pattern by Sew Chibi|

Scroll down for english, please. 


Fui encontrar mais umas fotos perdidas de um outro molde que testei para a Sew Chibi e que nunca chegaram ao blog. Desta vez foi o molde Natsu Shorts*, nem sequer tenho umas fotos assim mais ou menos para vos mostrar, mas não queria deixar passar, uma vez que, como é sabido, gosto muito dos moldes Sew Chibi, falo tanto deles e a maior parte nem sequer tinha publicado por aqui.

I found a few more lost pictures from yet another pattern I tested for Sew Chibi, and has never made it to the blog. This time it is the Natsu Shorts*, I don't even have better pictures of these to show, but I didn't want to let it go by, since, as you guys know, I really like Sew Chibi's patterns and I keep saying it but most of the patterns I haven't post yet. 


Além disso, os dois que fiz caem na categoria da reciclagem e do reaproveitamento daquilo que já temos e achei por bem falar sobre isso. Como podem ver pela primeira foto, fiz dois calções com o molde, um para ele, outro para ela. Comecemos pelo dela, para qual utilizei as mangas e uma tira que sobraram de uma t-shirt que já tinha reaproveitado para um outro projeto. Usei também os restos de uma malha (que usei aqui) e ainda uma t-shirt que ela adorava e que já não servia. 

Besides, both shorts fall under the refashion and what we already have upcycle cathegories, and I wanted to mention that. As you can see for the above photo, I made two of these with this pattern, one for him and one for her. Let´s start with hers, in which I used sleeves and a  piece I had left from a shirt I refashioned for a previous project. I also used a knit scrap (that I used here) and a pre-loved, outgrown t-shirt of hers. 

 
Usei então os restos da primeira para fazer o cós e os punhos das pernas. O tecido de malha para o corpo principal dos calções e a t-shirt dela foi reaproveitada para dar mais personalidade à peça. Escusado dizer que a miúda adorou e que os calções foram usados infinitas vezes. 

So I used the first shirt scraps for the waist and leg bands. The knit fabric was used as mais and her t-shirt was used to add a bit of persosnality to the piece. I don't need to say she loved it so much and these got to be worn over and over. 


É uma pena que já não sirvam... confesso que eu também gostei imenso do resultado. Temos gostos parecidos, eu e a mini me.

It's a shame they don't fit anymore... I confess I really liked them a lot too. We have very similar taste, my mini me & I. 

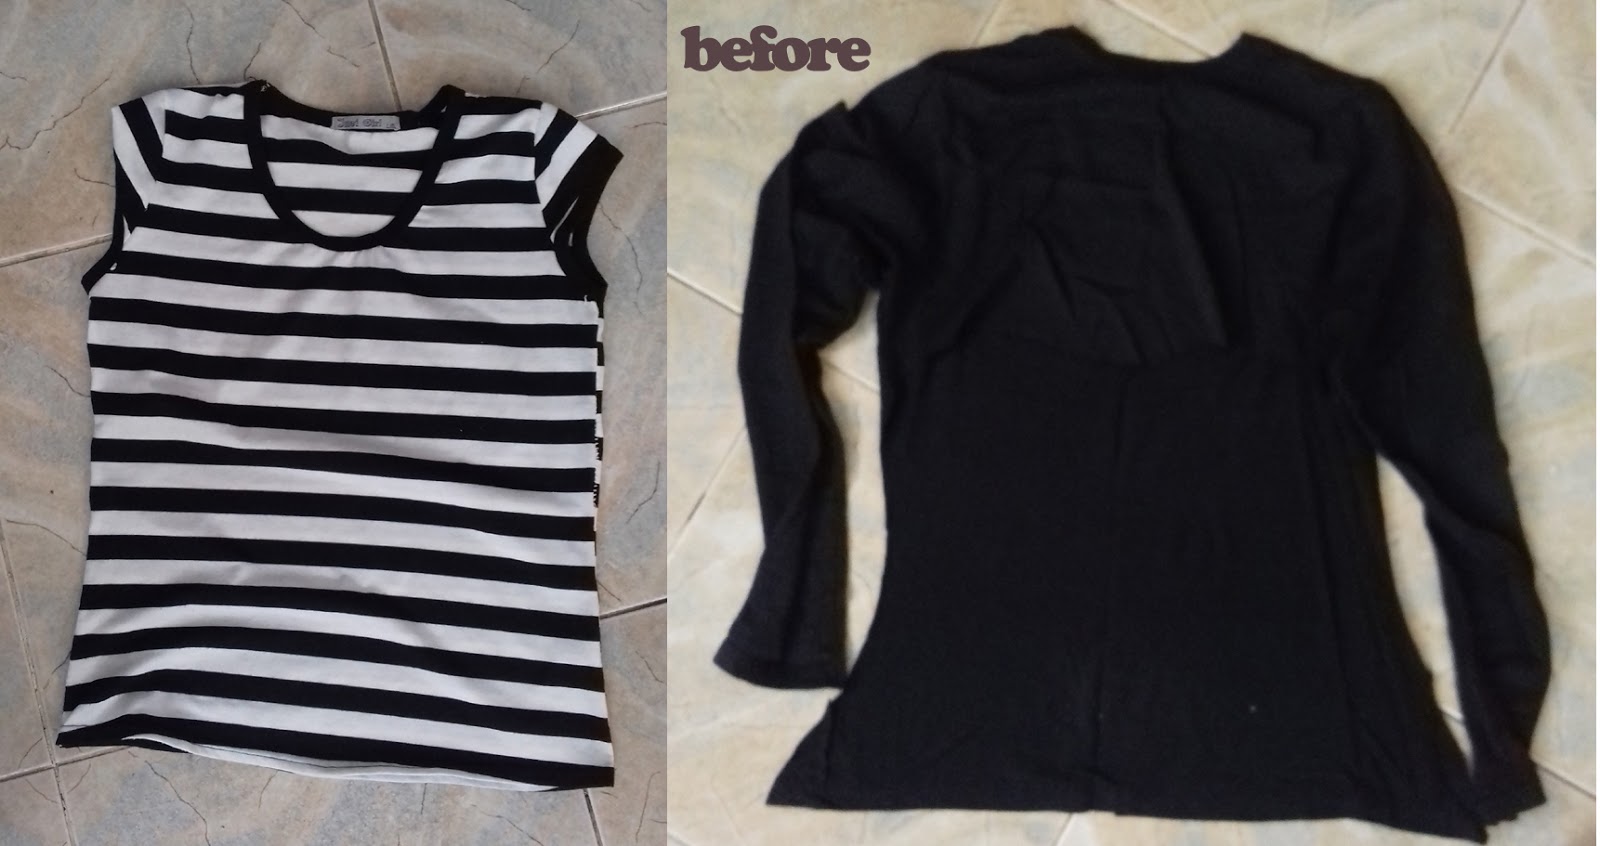
E depois dos dela, vamos aos dele. Também reciclei duas peças de mulher. Uma t-shirt às riscas e uma outra toda preta e simples. A ideia, se bem me recordo era fazer o corpo dos calções às riscas mas não conseguia cortar as duas peças da peça original que eu tinha, porém, não deixei de a usar por isso. Consigo ser tão teimosa quando quero.

And after hers, let's see his.  I also got to refashion, two women piece this time. I used a striped t-shirt and a plain black one. The idea was to use the striped one as main for the legs but it wasn't possible to cut both legs from that shirt, however, I didn't stop using it because of that. I can be very stubborn when I want to. 


E é aí que entra o desafio criativo que tanto me motivo nestas coisas. Então, usei a dita t-shirt para fazer uma das pernas dos calções, e usei a preta para a outra. Para o cós usei a preta também, e nos punhos das pernas, troquei os tecidos para criar um contraste engraçado. Gostam? 

There's when the creative challenge kicks in and I get so motivated. So, I used the said t-shirt for one of the legs only, and the other one, the black, for the other leg. For the waistband I used the black shirt too, and for the legbands I swapped the leg and the band fabrics for a fun contrast. Do you like it? 


Tal como os dela, estes calções tornaram-se uns dos nossos preferidos e tiveram imenso uso. São fáceis de fazer para nós, e fáceis de vestir e despir para eles. E claro, super confortáveis, o que é muito importante por aqui.

Just like happened to hers, these became some of our fave shorts and they were worn over and over. They are a quick sew for us, and pretty easy to put on and off for them. Oh, and of course, they are super comfy, which is madly important around here. 


E aquela barriga fofinha aqui em cima? O meu pequenino tem sido sempre tão difícil de fotografar, é que ele não consegue não se mexer por mais de dois segundos. Enfim, ao contrário do que fiz nos calções dela, nos dele optei por não colocar o cordão na cintura (e mesmo o dela, acabámos por retirar pouco depois pois ela não gostou muito).

Look at that cute tummy above? My little man has always been sohard to photograph, he just can't stand still for more than two seconds. Anyway, contrary to what I did on hers, his shorts do nor have a tie at the waist, I skipped it for his (and even in hers we took it out short after because she didn't like it much). 


 * The Natsu Shorties PDF Pattern is a relaxed fit, knee length, knit shorts pattern featuring contrast cuffs and drawstring waistband. Perfect summer shorties for girls AND boys; for kids 12/18M all the way up to 16Y!

2020-03-30

Burda refashioned skirt

Scroll down for english, please. 


Quem lê este blog há já algum tempo, é capaz de se lembrar da saia ali de cima, que fiz para o Challenge Create. Estavamos em 2014 e eu grávida do meu rapaz. Gostava imenso da saia e vesti-a muitas vezes, mas acabei por me cansar dela. Deixei de me sentir confortável com a mesma, e tentei transformá-la noutra mais composta. 

You may remember the skirt above, which I made for Challenge Create, if you're a long time reader of this blog. We were in 2014 and I was pregnant with my boy. I loved it and I wore it quite a few times, but then I just got over it, I didn't feel comfortable with it anymore, so I tried to make it into a more fitted garment. 


Há cerca de um ano, peguei num molde da Burda - na verdade era um molde de criança - mas que era precisamente aquilo que eu pretendia fazer. Como a saia era apenas tubular, bem simples, transformá-la foi canja. Só tive que cortar o cós para fora e usar o resto como tecido normal. Ah, e tem bolsos nas laterias.

Around a year ago, I grabbed myself a Burda pattern - it was a kid's pattern actually - but it was just what I wanted to use to transform this skirt. Since it was just a tube skirt I only had to cut off the waistband, and use it as normal fabric. Oh, and it has pockets on the sides. 

 A nova saia, tem uma cintura mais à medida, forma circular e fecha atrás com botões e fecho invisível. Acho que já comentei que os fechos, independentemente de há quantos anos costuro, são algo que me mete um bocado de medo, principalmente os invisíveis, por isso, dado o resultado desdte, posso considerar que até correu bem. 

The new skirt has a new fitted waistband, a circle cut and closes on the back with buttons and an invisible zipper. I believe I've told you before, that no matter how long I've been sewing, zippers always kind of make me nervous, especially invisible ones, so, I guess I did pretty good, and I am pleased with the results. 

2019-03-05

Tutorial: How to make a visible knee patch and fix a hole

Scroll down for english, please. 


Comecemos este post com algo ao qual as mães estamos bem habituadas: buracos nos joelhos das calças dos nossos filhos. Quem está comigo? 👋👋👋 O meu miúdo de quatro anos não é exceção À regra e aqui ando eu a tentar arranjar as dele. Quando dei conta da existência deste buraco, tentei arranjá-lo costurando à mão um pedacinho de tecido no interior do mesmo. Claro que os pontos depressa cederam, logo na primeira vez que as usou. 

Let's start this post with something mom's are pretty used to see: knee holes in our boys pants. Who's with me?! 👋👋👋 My four your old active little one is no exception and here I am trying to fix them. The first time I noticed this hole was getting too big I tried to fix it by hand stitching a patch to the knee hole area. Of course my stitches gave in after the first tiem he used them. 


Se forem como eu, fogem de arranjos como o diabo da cruz. Na verdade, são na maioria coisas rápidas de se fazer, mas só de pensar em descoser, não é? Bem, acompanhem-me lá, e com o vosso melhor sorriso vamos lá arranjar essas peças adoradas que precisam de um carinho extra. 💪

If you are anything like me, you'll avoid fixing clothes as much as you can. They are quick fixes most of the time, but just the thought of unpicking seams and all that. Right? Well, bare with me, put on your best smile and get to your machine to fix all those loved clothes that need just a little extra care. 💪

Para trabalhar melhor nessa zona, o mais sensato é começar por descoser a lateral da perna (a que não está pespontada) o suficiente para se conseguir costurar depois na máquina (1). Depois, usa-se um retalho de um tecido semelhante ou então algum que contraste se assim desejarmos. Eu usei um retalho do mesmo tecido que usei para o arranjo da calça da minha filha (último post), e como o tecido é fino, usei também um retalho de ganga para dar mais corpo (2). Coloquei o direito do tecido com motivos no avesso das calças (onde estava o buraco), e coloquei o retalho de ganga por cima desse. Alinhavei ambos às calças (3) e costurei à volta com um ponto em zigue zague (4). 

To better work on the knee area, you should unpick the side seam (the one that is not topstitched) just as much as you need to comfortable sew on your machine (1). Then use a scrap of a similar fabric and optionally a contrasting one if you want it to show in your patch. I did use a scrap of the same fabric my daughter chose for me to fix her's too (last post), and because it is a lighter fabric, I used to denim to give it a bit more weight (2). I've put the printed fabric right side to the wrong side of jeans (covering the hole), and the denim on top of it. Then basted both scraps to the leg (3) and sewed it with a zigzag stitch all around (4).  


Para terminar, trabalhasse pelo direito da peça. Usei um ponto a direito e passei pelo retalho várias vezes de uma ponta à outra. Normalmente coso uma linha a direito, e depois com a agulha em baixo mudo para o ponto de coser atrás e vou indo intercalando, só tendo que segurar o tecido para dar aquele efeito de zigue zague profundo. Virem as calças para o avesso novamente, fechem a lateral e é só chulear as costuras. 

To finish, work from the right side of the leg. Use a straight stitch and top stitch the patch from one side to the corner. I usually sew a straight line, then with my needle down switch to back stitch and sew another carefully guiding the fabric to make the deep zigzag effect. Turn pants wrong side again, close the side seam and finish it. 

2019-02-27

Tutorial: How to add extra lenght to your kids pants

Scroll down for english, please. 

Todos sabemos que num dia os nossos filhos vestem as suas calças preferidas, e no dia a seguir ficam-lhe demasiado curtas, certo? Eu, pelo menos, acho que já passámos todos por ai. E isso é o que aconteceu recentemente com todas as calças de ganga da minha filha. Continuam a servir-lhe, excepto no comprimento. Para resolver esse probleminha, e evitar ter de comprar calças novas tão cedo, optei por alongá-las um pouco. 

We all know that one day your child is wearing his fave pants and the next they are too short, right? Well, I think we've all been there. That's what recently happen to most of my girl's jeans. They still fit her except for lenght. To fix this little issue and avoid buying new ones so soon, I decided to add in some extra lenght.

Fica aqui um breve passo a passo de como o fazer, caso também precisem.
Here's a quick tutorial on how to do it, in case you need to as well. 

1. 
Começa por descoser a bainha e apenas um pouco das laterais das pernas das calças. 
Start by unpicking the hems and a bit of the legs side seams. 

2. 
Mede a largura da perna da frente e de trás. 
Measure the width of front and back leg piece. 

3. 
Corta duas peças (uma para a frente e uma para trás) para cada perna. Cada peça deverá medir de largura o mesmo que as vossas pernas e de comprimento o extra que querem acrescentar às calças x2 + 2cm para as costuras. Imagina que queres deixar as calças 5cm mais compridas, então cortas 12cm de comprimento. Dobra essas peças ao meio no comprimento, com o avesso com avesso, e vinca com o ferro. 
Cut two pieces (one front and one back) for each leg. Each piece should be width the same as your leg's, and lenght the one you need to add to your kid's pants x2 +2cm for seams. Image you need to add 5 cm more, you should cut a 12 cm piece. Fold them lenght wise, wrong sides together and press.

 4. 
Prende cada uma das peças às calças, e cose-as, chulei-a as costuras (se o tecido tiver algum padrão, certifica-te que ao virar para o direito este fica na posição correta). 
Pin it to your pants and sew, finish seams (if there is a pattern on the fabric, make sure it won't be upside down once you sew). 


5. 
Cose à máquina o lado que tem o pesponto na costura primeiro. Passa a ferro. 
Sew the side with the topstitching first. Press seam. 

6. 
Pesponta por onde já estava antes. Fecha o outro lado das calças e vinca a ferro a costura para cima. Podes pespontar a faixa que adicionaste ou deixar assim. 
Topstitch in the same place it was before. Close the other side of legs and press seams towards the top. You can either topstitch the band or just leave as it. 


Parabéns! Acabaste de arranjar as calças da tua criança e evitaste uma visita à loja mais próxima. No próximo post trago-vos outra forma de remendar umas calças e prolongar a sua vida. 
Congratulations! You have finished fixing your kid's pants and avoided a trip to the nearest store. I will bring you another quick fixing tip, that will allow you to extend pants life, in my next post. 

2018-09-17

Thread Faction #123 Pattern Tour

I am joining Liz from Thread Faction for her Sewing Knit Basics pattern tour. Today I am sharing my take on her new pattern #123 Girls Tank and Pants. 


The Tank n Pants Set was a winner in our house. I asked my daughter if I could try it on hr when I finished and she immediately asked me if she could sleep in it (it was about bed time) and of course I said yes. She loves these sets and I love to sew them for her. I see a few more in a near future coming out of my sewing machine. 


So. My kiddo's measurements put her on a straight 7 and I am happy with it although I think the bottom piece was a bit baggy on her. It allows to grow though which is something I always appreciate on a me made anyway. And, it is still comfortable she says, so all good here. 


The set is made of two pieces, top and knickers, it comes in sizes 2-10, has an optional gusset - which I did by the way - and it is a begginer's friendly pattern, just, so you know. It is another quick and easy sew, just what I need to get back into sewing. 


The main fabric from the top was given to me by my friend Patrícia, when she downsized her stash. The green one I used from the bottom of some launge pants my sister bought for me. They were new but she got it for me, not to wear as she knows I wouldn't wear anything with this lettuce colour on, but because it was a lot of knit for a little amount of money and I could refashion them. I love my sister (she got me two of these).


Apparently this is perfect to sleep in... except she was pretending to do so in my bed, instead of going to her own. Anyway, if you liked it and you got the pattern or are planning on it, make sure to follow Liz's Thread Faction Sewn Series on youtube, here's her first episode for you. 

2017-10-27

The Dress Up Hoodie |Mouse House Creations|

Scroll down for english, please. 


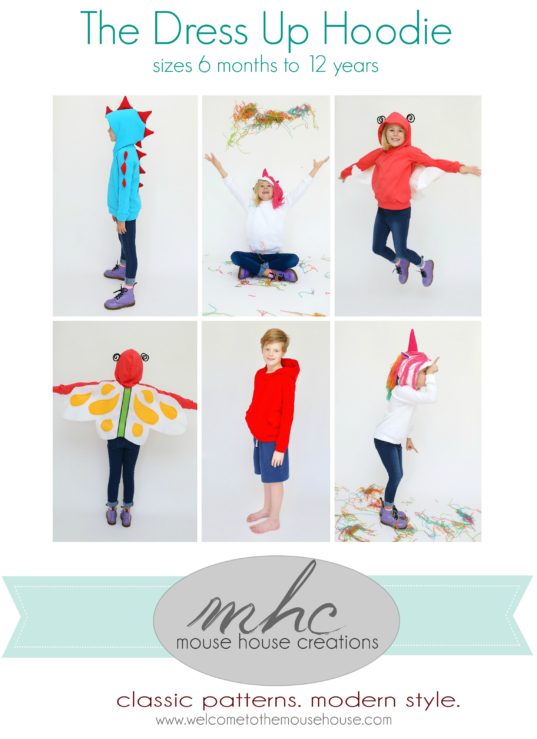
Minha gente, acaba de sair um novo molde pelo qual fiquei encantada. É o Dress Up Hoodie da Mouse House Creations é é qualquer coisa de especial. Além de que é perfeito para esta altura do ano, para quem gosta de festejar o Halloween. Mesmo que ainda não tenham costurado um fato para os miúdos, não se preocupem, este molde pode-vos salvar. 

People, there's a new pattern out there that got me amazed. It is the Dress Up Hoodie from Mouse House Creations and it really is something special. Just perfect for this Halloween season. Even if you're running behind with a costume, don't panic, this pattern might save you. 


O meu piolho tem de se mascarar dia 31 na escolinha e eu não tinha nada para ele até há dois dias, quando acabei este novo hoodie. Escolhi fazer a versão "morcego" para ele e ficou bem melhor do que eu esperava. Como não me dava tempo de encomendar uma malha à medida para este projeto, e preta como um pequeno morcego pede, acabei por usar o que tinha à mão. O que uma vez terminado, veio reforçar a minha ideia de que a nossa criatividade se apura sempre que temos de improvisar. Modéstia à parte, tornei-me muito boa nisso. 

I live in Portugal and we don't celebrate Halloween as people do in the USA, for example, but kids get to wear spooky costumes at school, and teens are actually doing trick or treat too for these past few years, first they were very shy, just a few, but now we hear them out all the time. The bad thing is that they do a lot of nasty stuff with the "halloween" excuse. Anyway... my boy needed a costume to wear at school next tuesday, and I had zero until two days ago when I finished this hoodie. I chose to make the "bat" for him and it got even better than I hoped for. I knew I didn't have the time to order the right knit for this project, in color and type, as a bat deserves, I just worked with what I had. Once finished, it just reinforced my belief that creativity improves every time you're forced to improvise. And modesty to the paret, I became pretty good at that. 

Mas continuando, usei uma malha mais fina, que em tempos foi uma fronha de almofada XXL, e que já tinha usado parte anteriormente. Não é completamente branca embora assim parece nas fotos, tiradas ao fim da tarde, numa luta contra o pôr do sol, e quase em desespero porque 1º não se queria virar para a máquina, depois não queria o capucho na cabeça, e só para irritar depois já não queria nada, até pediu para tirar o hoodie e tudo. Sempre foi do contra, fazer o quê? E olhem que ele delirou quando viu a peça... até gritou BATMANNNNN. Ainda conseguimos algumas que d´´a para vos mostrar os detalhes da peça, por isso já me dou por satisfeita. 

And on we go, I used a light knit, that was a XXL pillow cover, and which I had used a piece of a while ago. It is not totally white as it seems to be in these pictures, taking late in the afternoon, in a duel with the sunset, and almost in despair because this kid didn't want to stare at the camera first, then he didn't want to have the hood on his head and to finish, he just didn't want to wear it at all asking us to take it off. He's always been this way, what can I do? Believe me when I say he actually liked it a lot when he saw it... he even screamed BATMANNNNN. We did get a few shots though, which I think are just enough to show you the details. 


O molde é composto por vários animais, uns com capas, asas, unicórnios, caudas, orelhinhas, enfim... é muita fofura junta, e a mais velha também já fez o seu pedido. Para este usei o molde base do hoodie, dispensei o bolso da frente e em vez disso, desenhei (a olho mesmo) um morcego num papel, cortei-o em flanela (o que se revelou uma óptima opção, já que a flanela aderiu bem à malha, dando-lhe estabilidade e facilitando a sua aplicação - feita com um ponto zigue-zague muito pequenino). Usei as orelhas e asas de morcego, estas últimas são costuradas nas mangas, para as quais usei também a flanela. Era o único tecido preto na minha coleção que me pareceu indicado. 

The pattern is made out of several different animals, some have capes, wings, horns, tails, hears, as so... it's too much cuteness altogether, and my oldest has requested her own as well. For this specific one, I used the basic hoodie, skipped the front pocked and instead I free hand drafted a bat in a papel, then cut it on flannel (which was a great option, since it adhered to the knit nicely, give it some stability and making the sewing task much easier - applied with a very small zig zag stitch). I used the bat ears and wings, this last one is sewed to the sleeves, and I used flannel for them too. This was the only fabric in my stash that seemed appropriate for the project. 


Adoro ver as asas a abrir e a fechar conforme ele mexe os braços. Ainda pensei que se poderia tornar desconfortável quando ele os estica mais para a frente, mas aparentemente isso não acontece, pelo menos não se queixou. As nossas orelhinhas não se aguentam de pé, muito possivelmente porque o tecido não tem corpo suficiente para se manter, ainda assim não deixar de ser super fofas. Agora, penso que devia ter usado preto para os dois lados, frente e trás. Ah, e os punhos são reciclados de hoodies de adulto. 

I love to see the wings moving as he opens or closes his arms. I thought it'd be uncomfortable for him when he pulls his arms forward, but aparently that doesn't happen, or at least he did not complain yet. Our ears don't stand up, possible because our knit hasn't got enough structure to stand, nonetheless they are still pretty cute. Staring at it now, I think I should have used the black fabric for front and back. Oh, and our bands were recycled from adult hoodies. 


Se ele gostou? Claro que sim! A foto acima confirma-o. Só queria que este calor passasse duma para que terça feira o miúdo não assasse dentro do hoodie. E para quem desse lado gostou da ideia, ainda vão a tempo de espreitar todas as outras opções disponíveis e comprar o molde em desconto (link lá acima, logo no início deste post). Têm o fim de semana para pôr mãos à obra. Depois juntam umas calças pretas (que é o que eu vou fazer) e em duas horas têm um disfarce pronto. 

Did he like it? Oh yes! The above photo seals that. I just wanted this hot weather to be finally gone for good, so tuesday the boy wouldn't bake inside the hoodie. And if you liked the idea you're still in time to check all the other options and get the pattern on sale (link above in this post). You have the weekend to sew. Then you just throw in a pair of black pants (which is surely what I'll do) and, in about two hours, you have yourself a new costume. 

2016-07-13

Refashion Month 2016

Scroll down for english, please. 


Sentiram saudades minhas? Sei que demorei mais tempo do que o normal, e do que aquele que realmente teria gostado, para voltar, mas as coisas complicaram-se por aqui. Por vezes é necessário afastarmos-nos até das pequenas coisas que nos fazem felizes - como costurar - para podermos voltar à vida novamente, e respirar como devido. Com isso, queria dizer que voltei, embora a passos pequenos, tentando manter o ritmo, por isso, tenham paciência comigo. Agora, podem (ou não) ter-se apercebido que estamos em Julho, e que normalmente isso significa um mês cheio de convidados e muitas reciclagens por aqui. No entanto, já vamos a meio do mês e até aqui nada, não é?! Comecei a organizar o evento há umas semanas, mas depois a vida aconteceu. Porém, e com a ajuda de algumas bloggers fantásticas, o mês de Refashion aqui no blog começa hoje, e até ao fim do mês, serão partilhados os seus talentos connosco. Este ano, e porque fui uma terrível anfitriã, as coisas acontecem ainda mais descontraidamente do que o normal. Não há sorteios - desculpem, sei que são giros, mas faço isto pela diversão de realmente gostar de reciclagem de roupa, simples como isso. Espero que todos aproveitem, quem lê e quem faz. Obrigado a todos por estarem desse lado!!!

Did you miss me? I know it has been taking me longer than usual and what I would have liked to, but things just went a little out of control over here. Sometimes you just need to step aside from everything, even the little things that give you joy - like sewing - to be able to come back to life again, and breath as it should. That said, I am back, and trying to get the groove going. I am taking baby steps here though, so bear with me, please. Now, you might (or might not) have realised that it is July, and usually that means a full month of guests and refashions over here. And yet, we're half way through it and nothing yet, right?! I did start organizing it, but then life really got in the way. However, and with the help of the amazing bloggers that will be sharing their talents with us, Refashion Month quicks off today, and we will have guests over for the next days of the month. This year though, and because I was a terrible hostess, things are going even smoother than it usually goes. There are no giveaways - sorry, I know they are fun, but I am making this for the fun of loving it, plain as that. I hope everyone enjoys it, readers, and makers. Thank you all for being on that side!!!


Começo eu, com uma alteração tão comum, tão simples e fácil, mas que continua a ser das minhas preferidas. Já toda a gente deve ter feito isto pelo menos uma vez na vida: transformar calças em calções. Eu tenho uma colecção considerável de calças de ganga, são o meu uniforme a maior parte do ano, mas percebi que me faltavam alguns calções para o tempo mais quente. Assim que escolhi algumas das que menos usava, transformei-as em calções, e escolhi estes para vos mostrar hoje. 

I start, with a  very common, simple and so easy refashion, that's still one of my faves, though. I bet everyone has done this at least once in their lives: turning a pair of pants into a pair of shorts. I own a pretty large collection of jeans, they're like my daily uniform most of the year, but I noticed I missed some shorts on my wardrobe for the warmer days. So I went through the jeans I used the least, picked a couple and turned them into shorts, I chose these to share today. 


Tudo o que precisei para esta reciclagem foi: um par de calças, rendas que aproveitei de uma túnica (foi a única coisa capaz que restou da peça além de um retalhinho que usei aqui) e linha a condizer.

All I needed for this refashion was: a pair of jeans, lace I saved from a tunic (it was the only thing worth saving from this tunic, besides the scrap I used here), and matching thread. 


Foi assim que fiz.
1. segurei os bolsos de dentro com um alfinete para evitar de os cortar acidentalmente. Marquei por onde queria cortar. 2. Cortei ambas as pernas. 3. Medi a largura necessária para cortar a renda, que não mostro na foto mas que costurei, de forma a formar um aro. 4. Alfinetei a renda às pernas, direito com direito. 5. Cosi e chuleei. 6. Marquei com o ferro os valores de costura para cima.

Here's how I made it.
1. I pinned the pocket bags to the top to avoid cutting them accidentally. Market the lenght where I wanted it to be. 2. I've cut both legs. 3. I measured the lenght of the legs so I could cut the lace in the same lenght, not pictures, I sewed the lace into a loop. 4. I've pinned the lace to the legs, right sides together. 5. Sewn and finish the seams. 6. Pressed seams allowances towards the top. 


Feito e prontinho para este clima de verão.

Done and ready for this summer weather. 


Voltem nos próximos dias se quiserem ver o que as minhas convidadas têm preparado para partilhar connosco. 

Come back the next few days to check out what my guests have prepared for us. 

Labels

About us Acessories Adult Adults Advent Calendar Appliqué Baby Baby Acessories Baby Doll Acessories Baby Doll Sling Baby Shoes Back Warmer Pillow Backpack Bags Barbie Beading Beads Bedsheets Beret Bibs Bikini Blankets Blazer Bleached Blog Tour Blogs Blouse Bolero Book Covers Book Review Boots Bowling Game Boxers Boy Bracelet Bralette Breastfeeding Pillows Briefs Button Shirt Button Up Shirt Cap Cardigan Carnival Causes Cell Phone Stand Challenge Create Charger Support Chevron Christmas Clutch Coats Commitments Constant Change Contests cookies Corset Cose+ Costumes Cowl CraftingCon Crochet Crossstitching Cushions Dance Outfit dashiki Dia de Los Muertos Diaper Pouch Doll Clothes Dolls Drawstring Bags Dreamcatcher Dress Duvet Cover e-book E-Zine Review Easter Embroidery EnglishPaperPiecing Fabric Baskets Fabric Chess Game Fabric dolls Fabric Flowers Fabric Games Fabric Memory Games Fabric Printing Fabric Stash Fabric Three in a Row Game Fabric Toys Features Felt Flamenco Dress Flamenco pants Food Free PDF Pattern Fun Cakes Funny Fur Gifts Girl Giveaway Glasses Case Granny Squares Guest Posting Hair Clips Hair Clips Hanger Halloween Hand Warmer Pillows handbag Handmade Cards Harem Headband Henley Highlow Home Homemade Liquid Soap Hoodie How to Inspiration Jackets Japanese Sewing jeans Joggers Jumper KCW Keyring Kid's Choice Series Kid's Crafts Kimono Kleenex Purse Pouch knitting Knock it Off Leather lederhosen Leg Warmers Leggings lunchbag Maratón Telaria MashUp Series Maternity MeMadeMay; Men Mending Challenge Mini-Sofa Cover Mobile Mobile bag Mom's Monthly Wrap Up Needle Rolls Nightgown No Sew Nursery One Thimble Onesies Operation: Project 0$ Other Crafts Ottobre Overalls Pajamas Pants Paper Crafts Party Favours Party Time Patchwork Pattern Pattern Testing Pattern Tour Pear Puff Seat Pencil Case Pencil Rolls Peplum Peques de Cine Peter Pan Collar Pijamas Pillow Covers Pillows Piñata Cake Pinterest Challenge Pipe Cleaner Crafts Placket Pockets Plastic bags Dispenser Pleats Pocket Slings Podcast Pompoms Pouch Practising ´n Improving Project Run and Play Project Sewn Projects Pt Refashion Week Quilting Recipes Recycled Ribbon Organizer Recycling Refashion Month 2012 Refashion Month 2013 Refashion Month 2014 Refashion Month 2014 (2) Refashion Month 2015 Refashion Month 2016 Refashion Runway Refashioning Retro Reverse applique Reviews Ribbon Roses Robe Romper Romper Dress Romper Week Roots Round up Rucksack Saving Series Saving while Sewing Savings Made By Sewing Scarf ScrapsBusting Sequins Sew 20's Sew Along Sew Geeky Sew In Tune Sew-a-bration of Womanhood Sew-vivor Sewing Tips Shirt Shorts Skirt Skort Sleep Sack Slings Slippers Snowflakes & Lace Sock Monkey Socks Stitching Suit Surprise Sweater sweatshirt Swimsuit swimwear T-shirt The Hearties The Sew Off Thrift shopping Tights Tips Tissue Case Toddler Top Top 12 of 2012 Top 5 of 2013 Top 5 of 2014 TOP 5 of 2015 top 5 of 2017 Top Stitchers Trousers TSNEM Tunic Tutorial Tutu underpants Underwear Upcycling Vest Videos Vintage waistbag Wallet When things go wrong WIP Women Wreath Year Wrap Up

Cose +

Cose +
Magazine de Costura em Poruguês