2014-02-25

Sewing from my Stash and Refashioning

NOTE: long post, I made this mostly for myself, so I can keep track of what I have, but it might inspire someone.

Just a little more than a year ago, I joined a challenge of sewing from my stash. Actually I had started doing it before,  but by the time I blogged it, I shared some photos from the stash I had. I am pretty sure I forgot to take photos to some things I already had, but not much. 

Yesterday I thought I would take some photos of the fabric I have right now, after I've spent an entire year buying as little fabric as I could. The first thing I can tell from one year to another is how much more organized I got, and how much better my fabric piles look right now. I've been organizing it bit by bit and some of the fabric is still out of place, but I will get there.


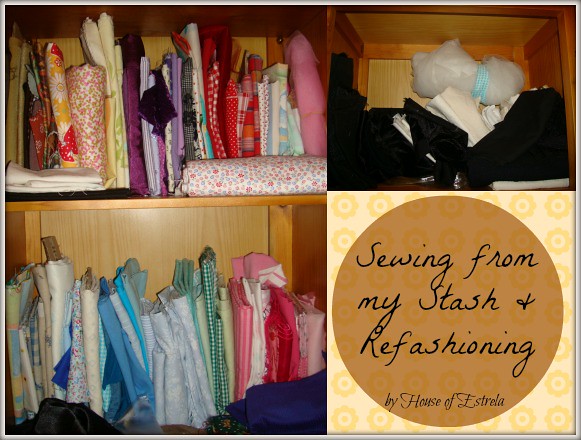
To start, I have moved my fabric from one place to another over and over for the last year. In the photo above you can see my smaller pieces of fabric shelves. They are three of them, I was using the first one for my Burda, Patrones and Manequim pattern magazines. The pile grew and I moved them somewhere else. The two shelves below held my scraps. I can spot a few from there that I no longer have, they have been used already.

Right now, in the next photo, is the same three shelves. They still hold smaller pieces of fabric, but I have fold them properly (or at least much better) and have been trying to organize them by colours. White and black on the top one (and a bit messy right now) and the two below holding the other colours. I think this is the pile that looks much smaller than the one from the previous year. I was able to use a lot of them for my duvet cover.


The next 2 photos below are 1. refashioning clothes and 2. boxes of small scraps, and all the large pieces of fabric I had last time I photographed them. 

When looking at the refashioning pile I can spot at least 9 pieces that were already turned into something else. But they weren't that organized either. There was much more underneath. 

As for the bigger pieces of fabric, I was able to return some to that business partner I had, and I know I used some of them... not as much as I'd like though. Since they are big pieces, they were used, but I still have some left. 

Anyway, if you've missed it, by the end of 2013 I've put up a post with pictures of everything I made using my faric stash and everything I made that was refashioned. Find it HERE


I'm now determined to keep my fabric organized and visible at all times. Bigger, medium and smaller pieces of fabric, all have to be quickly found when it comes to start a new project. I have been saving card boxes of different sizes so I can store the different sizes of fabric in them. So far, here's what I got:

1. Bigger pieces of fabric - the ones on the vertical are the ones that are already wrapped in the card, the ones on the horizontal are waiting for card for their own. I am trying to keep them by colours. 
2. This used to be a CD case, but when destashing my cds, I threw the covers away, saved them in folders and saved myself A LOT of space. I was going to either give away or try to sell the case, but then I looked at it with different eyes and since it has do many small shelves, I thought it'd be perfect to keeo those very small pieces of fabric that I find hard to part with. It isn't organized yet. I just started there, but it will be in time. Right now you can see medium pieces of fabric in that bigger shelf on the side, refashioning items I bought this year already and are waiting to be put in the right place and if you look to the bottom shelf of the photo, you can spot a yellow fabric, already folded, together with a few others of blue tones. That is what I plan to do all over here. 
3. A box of refashioning potencial items. Most of it, is a fur jacket older than I am that belonged to my mother. 
4. The biggest pile. Underneath (lower shelf), there are clothes for refashion... I got a lot (donated) by the end of the year, so I have even more than I had before. On the top shelf, I have - for now - the very small scraps in the boxes and then there are left overs from previous refashions. Yes, it's a huge pile, but I have a problem of getting to attached to fabric... I always believe I will need them in the future. Eventually I did use some in other projects but most just stay there. 


I did manage to fill a fabric bag with lots of scraps and fabrics I didn't want anymore last year and donated too. And I've tried to put some away as I organized them this time, but not much was out. I am trying to work on this and see if it gets easier to part from those fabrics I don't need or won't use. 

Oh, and I realised as I organized my fabric stash, that most of my bigger pieces are of solid colours. Maybe that's something I should point when it is time to mention my signature style for Project Run and Play & Project Sewn sew alongs... right?!

2014-02-23

Gift for Lia #3

It is time to show you the third and last present we took to Lia, the newborn baby girl from our friends. In case you missed it, the first one was a breastfeeding pillow, and the second was one of the cutest dresses I've done. The thrird and last present was the simpliest of them all. I had these two ready for her, but since I still had time to sew something before we meet, I made her a more spring/summer like pair of leggings. It is so cold right now, but I just can think of warmer weather right now. 


I picked a slightly stretching polka dotted fabric I bought last year in a street market in Spain. I had a meter of this fabric that I just love and couldn't decide what to do with it. Our friend J. (the mom), just like me, isn't  a fan of the traditional pink used on everything baby, so I thought she'd like this one. 

I made the 3-6 month size, I drafted the pattern from  apair of leggings from G. and tried to make it just a tiny bit bigger, because I looked at it and it just seemed so little, I was kinda afraid it wouldn't fit the baby when the warmer weather arrived. 

It's amazing how we forget how tiny they are and look when they are this young. She was about the same in weight and height as mine when she was born but still, I looked at her and couldn't believe G. was that little back in the days. It felt so good to hold a newborn again in my arms, and to see how caring G. was with her. Can't believe I will be holding one of my own again in a few months. 

2014-02-22

Gift for Lia #2

Yesterday, I told you about our friends new baby girl and the 3 gifts we brought her. The first one was the breastfeeding pillow, and today I am sharing the second gift. It was a dress. A dress I have mentioned here before and have actually shared a sneak peak from. Can you remember?


I made this dress, way back in August when I did my first test for the Bumblebee Pattern by Sewing MamaRaeAnna. It was made for another baby girl from a blogger friend, we wanted to meet but for many reasons =( that never happen and I just knew as time passed that the dress would no longer fit her. Good thing, little after that we knew about J.'s pregnancy and the baby gender being a girl. I was happy I would have another girl to give this dress to. 

So, for this dress I used a pillow cover I had bought a few years ago for 1€ only (I actually bought two), and the fabric was just enough for the dress. I mixed it with leftovers from the blue I used on my daughter's flamenco dress lining, and it was a perfect combination for me. This dress is also fully lined and the fabric I used for it was from a white sheet. It is a 6M size, with the front ruffle option on the front, and buttons to close on the back. I used green flower shaped, wodden buttons from my stash. 


I was happy that I was able to use the mom and baby cow centered in the front of the dress, it was just by an inch, but it was possible. Everyone that has seen this dress has told me it is one of the cutest ones I have made so far, and I have to agree. I love it so much! I think it's the bright colours, put together with the solid blue. I just can't wait for summer to come and see baby L. wearing it. 

I'm off now, please come back tomorrow to see what gift #3 baby L. got from us... I am sure, I will be making more items for her, but those were the ones she got for now. 

2014-02-21

Gift for Lia #1


Yesterday we visited our friends |first| baby girl. She was born January 26th, but we weren't able to meet her before. First because we were all ill when she was born, then because we just had this or that (or her parents did). Well, yesterday, as I said, we made it. 


We took three presents for her with us. I will share them in three different posts. The first for today, is the breastfeeding pillow. I wanted to give it to my friends for Christmas, while J. was still pregnant, I know I used mine a lot for the first pregnancy and sure will start to use it again sometime soon this time. But, I was already pregnant too, going though a messy first trimester when I could barely sew... so, only now, that the little one is born, almost for a month now, was I able to give it to them. Luckily for me, she didn't have one yet. I love this fabric and it's perfect for her because her parents are |very| beach people... 

I usually make them 2 sizes when I sell them, and I picked the big one for her, because it was also the one I prefered when it came my turn to use them (of course, since I was doing them for sell back then, I got myself both sizes). I love the fact that it can be used for so many things and not only help us feed the baby. 

2014-02-20

Can you guess?

Yesterday I went to my usual charity shop. Carnival is when we celebrate with costumes around here, and I was looking for thrift finds to make my daughter the costume she asked from me. I already made two pieces for her school costume (will show later, they will finish it in school), but I didn't have any fabric or refashioning clothing to make it ... or so I thought!


I found the colours I needed: dark and light blue, and yellow. I just wished the yellow was at least the same lenght as the light blue, but this was the best I could find. 

I was really excited that I found everything I needed. Once I got home I wasn't so happy. The yellow was too thin and it's a bit too cold yet - but I could fix it, I searched my refashion stash and found a pair of pants I can totally use for layering underneath... Good. Then, the light blue was ok, but the dark blue I brought, was from this beautiful girl's dress, in velvet... did I ever mention how much I love velvet?

I just can't put my scissors in it. I can't, I love the original piece too much. Of course it still is too big for G. and too short for my niece L. but I think I will save it until G. can wear it... or until I just change my mind and use it for refashioning. 

I really need the dark blue for this costume though. Oh... problem again! I searched the fabric stash again... the blue fabrics I have are no good for what I need... none of them. Then I remember, someone had donated something navy blue to me a few months ago. I searched and searched for it and ... my day was saved! I found it. 

I also need some pretty red fabric, and luckily for me I had the perfect silky scrap in my stash. Just a scrap but I believe is enough. So, all this will make for my daughter's costume. 

And I am wondering... can you guess what will it be? 

Want a hint?
 It's a princess... 

2014-02-18

Project Sewn week 3 sew along

Project Sewn has started and it's already on its third week. I had plans to sew along with every theme, but again, I was wanting more than I could eventually handle. I am happy I made it this week though, and hopefully I'm still on time to try to sew along the last week too. 


This week's theme is If the Show Fits, which means we were suppoused to grab a pair of our favourite shoes (any kind of) and sew a garment based/inspired on it. I have so many shoes that I just love... But I haven't been wearing them for a while. I've been using a pair of brown boots to exaustion lately, they fit with most of my clothes and they're so easy to put on and comfortable too. 

sorry for the blurry photos, most of my photos came wrong and I couldn't re-do them all over again. 
I was also suppoused to test MamaNene's newest pattern The Plaid Sheer Top last month, but because I was feeling ill and with the baby sickness I totally failed her and missed the test. I promised I would still make it and here it is. I used a piece of a heavy wool fabric I had left from the Winter Love Flowers outfit I made my daughter back in 2012 - I'm so terrible sad that it doesn't fit her anymore, it has been one of my favourites ever since. 


Because it's winter here, I needed something cozy and warm to keep me satisfied (once I am the most sensible person to cold weather on earth!), and that's why I chose this fabric. I didn't like that it gives the top such a hard look/touch, and that it is so hard to iron. But at least, I did something for me, crossed another fabric out of my stash (only small scraps were left) and it has space for my growing belly. Also it was such a quick sew, I might have to try a spring version with a light fabric later. 

2014-02-17

WIP: Duvet Cover

Back in July 2013, I realised I didn't have a single duvet cover that would be big enough for my bed. We changed our regular bed for a bigger one and suddenly nothing would fit. So, I thought about making one myself. A patchworked one. I searched for inspiration and I finally decided what I'd like. I still don't own a rotary cutter or a mat, so all my cutting is made by tracing and using a scissors. Extra work, yes! But it has been worth it! I started it not long after I thought about making it, but of course, there are times (weeks and even months) when I won't even touch a single scrap from it.

I haven't blogged about it either. I did show you a bit of it when I did a round up of my 2013 creations (here) but it has only been through facebook that I shared a few photos from it every now and then. I've been so excited about it these last few days that I want to share my work in progress with you all and share details for the ones interested! 

Here's the pattern I made to organize myself. It will have 1025 scraps sewn together when finished, and it's made out of 72 patched blocks. Gorgeous! It's been a great way to bust my stash and it has always been great to sew, because everytime I attach a new scrap piece, it reminds me of any other projects I have done using that same fabric. I tried to count how many different fabrics I've used so far, but I got lost so I will try to do it again once it's done. 


And here are the photos I've been sharing along through facebook, just in case you missed them. They are taken since the first scraps until around the last time I touched it a couple of months ago. 


I still remember how happy I felt after sewing together the first row of blocks... then looking at it and thinking... Crap, there are another 7 of these to make!


please excuse my dirty iron board, but I have two cats that don't help at all


Just a few days ago, I started working on it again. I started writing this post a week ago, and then I had
- 3 entire rows (of 9 bloks) sewn together 
- one row (of 9 blocks) sewn together waiting to be attached to the other 3
- 9 other squares pinned to the yellow stripes to be sewn together and make a fifth row
- 16 other squares finished and 
- 4 squares half way done

Today, I have:
- 6 entire rows of 9 blocks finished and put together (see photo below)
- all my blocks finished
- 7 blocks have the yellow tripe sewn together, so there's nearly another row of blocks ready to be put together. 

When looking at it like that I don't think there's much left to do. I'm way over half the work and it feels really good. I can't actually wait to see it finished. I thought I'd really have to hurry to get it done before baby two is due (in July), but I am very positive about it now. I need this for summer and I know that if I kept postponing this, I wouldn't ever finish before this baby arrives... and after that, who knows when I would I be able to finish, right? 


Here's some of the latest shoots. I like some blocks better than others, but I don't really follow an order to sew the little scraps together, so that had to happen of course. I surely have spent quite a while contemplanting it already. It already fits a regular couple's bed, and it's just beautiful to see. 

My daughter has been asking me to make one for her bed too. Maybe as her 3rd birthday present?! Who knows? Since she's going to share her room with the baby, I might wait until I know the gender and perhaps I'll be able to do something coordinate for both. 

2014-02-13

Butterfly Pillow


A couple of weeks ago, parents were asked to take a small pillow to daycare. I believe it was for story telling time. I had lots of small pillows around my living room, so I thought about making a cover for one of them. 

I used the heart shaped fabric from my stash... yes... you've been seeing a few projects out of the same fabric, I hope you won't get bored of it... as I was saying, I really want to get rid of this but I still have a piece of it! I wanted to identify it with G. somehow. I thought about adding  her name with the apliqué technique... but her name is quite long and I was feeling lazy and in a hurry to finish this and take it to daycare (because i forgot I had to for a few days and I was on top of the deadline). 


My daughter's class is called "little animals" and each of the kids has choosen an animal to identify their stuff. My daughter picked the butterfly... how cute?! Adding a butterfly to the pillow would be great, right? What to use then? Fabric? I needed something quick remember?! So no! No to fabric, I used felt... I searched in my felt stash and I had the perfect colours! I didn't make a pattern or so ever. I just cut and hoped for the best, then pinned everything together and stitched.

I really liked it and her teacher was really surprised with it. She loved it and told me they were considering adding the kid's animals to the pillows. "Well, you'll save your work with this one, is done for you" I said, and she smiled. 

They are now preparing Carnival costumes and I have sewn something for that too... also I've been working on a home project... soon I'll be sharing all these. 

2014-02-05

PR&P S8 week 4: Signature Style

It is the fourth and last week of the 8th season of Project Run & Play. And that means it is Signature Style week. Mmmmm... what a bittersweet week this always is. I always keep wondering what my signature is, still don't have a clear idea. So, for past signature weeks, I've realised I tend to: I always make a draft of what I want - but never stick to it; refashioning is absolutely part of my signature; I like to create simple, comfy and above all wearable clothes with a small outstanding detail and spending as little as I can. Also, last season, I've asked in my blog post what you'd think my signature was, and a friend told me she thought it was made of simple lines and colors, different from shops, rich in details and practical. So, considering all the above, here's what I got for this Signature week. Not one, but two looks to make up for the uncompleted looks I did the previous weeks. 


And the best part of this?! It costed near to 0€... I only had to buy some elastic for the short's waist which was about 0,20€ max. 

As I mentioned already in a previous post, I planned to dedicate the whole season to sewing for the 4 kids in my close family: my daughter got weeks one & four, nephew L. got week two, niece L. got weeks two and three (lucky her) and grandniece M. got week four. I did make up for my goal! A total of 8 pieces for this season. 


Anyway... about today's looks. I started by designing my niece's outfit. I've asked her mom if she was in need of any piece and she said shorts would be great. I started with the shorts then. She wanted something like bubble ones but not too bubble, so I used the same self drafted pattern I have used a few times before (little reminder below) but added again a little different touch in adding the pockets. I got the idea from a store bought shorts my daughter has. The pockets have a big pleat in the middle, and the placket is cut asymetrically. The buttons on these are merely decorative.


For the top, I used RaeAnna's Cupcake top pattern, the one I mentioned I had tested here, but I did a few changes to it. It took me a while to surrender to the highlow trend, but I finally tried it. So, since the Cupcake is large in lenght it was perfect to cut on the front and round up on the back to achieve the look I wasnted. I also narrowed it a bit on the bottom. To make this I have refashioned! Of course! I used one of my old turtle necks (red) and a tank top (white) that actually belonged to her mother before. It has a little lace attached and it was perfect to add some details. I made the sleeves from the main body of the top, so I was able to use the seams saving time. I also attached some of that lace to the new top bottom seams. For the collar, I didn't have enough fabric left, but I carefully ripped it from another existing white shirt and reattached it to this one. Perfect and no one would guess. 


I had this idea in my mind to coordinate the girls though (they are only one year apart), so we could have a photoshoot of the two of them together, looking all cute and all. But oh boy, the weather hasn't been the kindest and we had to shoot inside (hence the flashy photos)... and little M. is just impossible to photograph. 


She just doesn't stay still for one only second. We were two taking photos, but most just don't worked out. Someone gave mine a pack of cookies and she just wouldn't let go of it. 


So, I said I wanted them to coordinate, but I didn't want them to be too matchy matchy, so for my little girl, I made a tunic. I used a pattern from the spanish magazine Patrones, and only changed the lenght, the one from the magazine was a bit shorter. The plaid fabric was in my stash for years, I have only once used a little bit of it for a dress for myself (on the side) and it was about time to get done with it. One thing less in my stash - yes, I'm still trying to destash this year, and I have been a good girl, not buying anything new that I don't need at all. 


This tunic has become one of my fave things for the past few months. I wasn't expecting to love this as much as I did when I was done. I was trying to not buy anything, so I had to get creative with the buttons. All the ones I liked and looked good here were only ones that I had a 2-3 amount of only, and that wouldn't work. Then the closest I had to the 5 buttons I needed was theses start shaped ones. The problem was that I only had 4 white and 3 red. None would make the 5, so, just like I did with her robe, I mismatched one of them. In the robe I used letter buttons and then just one bear head, and this time I used 4 white buttons and an outstanding red one. the two reds that were left, are the ones you can see on niece's shorts pockets. To finish the tunic I used a white eyelet trim I had saved from something I got rid a while ago, and used a little white trim to finish off the bottom of the sleeves and one of the front panels. for the photos I paired it with her black leggings that go with evething! 


It was a happy sewing week for me. And I'm just in love with my little girl's latest look. 

2014-02-03

KCW and a pratical knock it off

I'll start with a statement. 
I am cheap. 
I don't refashion and re-use just because it is fun and pushes my creativity. Well, it does that too and I  much appreciate it. But the main reason why I do that is because I live on a budget. We have one only income and it's not that much, so how can I feed my hobby and love for sewing when everything is so expansive (for me at least!)? You have to become resourceful when you find yourself in this situation. 

It has been KCW from the 27th 'til today. Everytime KCW happens, I plan to behave and sew along the entire week and get great things done. In my dreams, of course! This time is was illness that didn't allow me to organize for the event. Still, it seams I always squeeze something at the last minute. Of course, it isn't something beautiful or much interesting. I went practical. I tried to get something done, which was needed and always postponed, left behind for things that could have actually waited a bit more. 

So, my kid went to a daycare center back in September and she needed a school overall like the other kids. I ordered it as all moms and waited, and waited and waited for it to come. Over a month it arrived and it was painful for me to pay 20€ for it. I mean, it wasn't even well finished or anything, I'm sure those buttons are nearly falling by now. So, what does a smart sewing momma do? Go run to the fabric store and buys blue, yellow and red fabric... I knew I had a quite enough of the similar orange and when I organized my fabric stash a while ago I realized I didn't need the red either. Anyway... I bought the three pieces of fabric - just enough for the overall, and spent less than 4€... Mmmm interesting! I could make 5 of these with the 20€. 


But, as I mentioned this has been postponed ever since and I was getting tired of hurrying washing the bought one everytime it came home. and it's winter so it doesn't dry that easy, and yes, I do have a dryer but I refuse to make it work with one piece in it only. So, I finally did the overall this weekend. Started and saturday morning and almost finished, but then I started to feel dizzy again (blood pressure hasn't been nice lately), and I had to stop until sunday, when I finally made the button holes and sewn all buttons to it. Also had to add the pocket (and only realised it's not even when I edited these photos - gotta take it off an do again!), and handstitched her name on it. 


2014-02-01

January Refashion Month Wrap Up Time

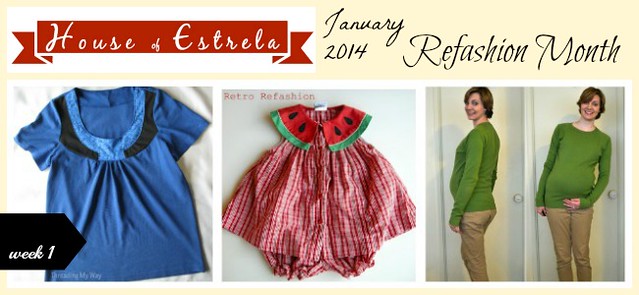
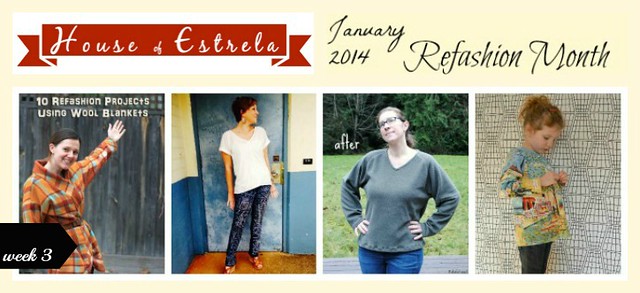
I still can't believe the first month of the year is already gone. Of course, all the guests I had during the entire January made it pass quite quickly and warmed my heart. I would never guessed to have so many refashioning inspiration together here in my old little blog. You wouldn't expect anything else from all this ladies, right? And I thank each of them deeply for helping me put up this series. It'd be nothing without them. 

I really hope everyone has enjoyed themselves. The ones who were invited, the ones who have sewn along and the ones who just enjoyed seeing and reading through it all. If we were able to get at least one of you into the refashion mania then I am feeling pretty happy. I also hope, this series to be a source of inspiration for everyone out there. 

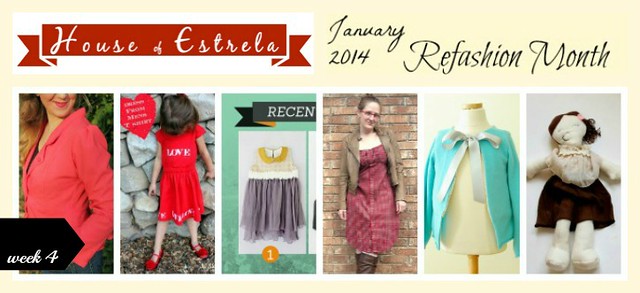
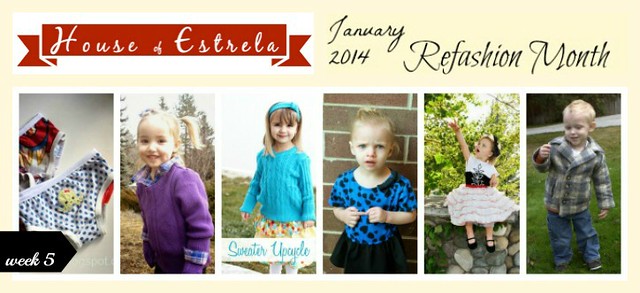
Today, it is time for a wrap up from everything we had in January Refashion Month. I was happy to see how many different articles were shared this season, the personal wrap ups of past refashions, the tips for begginers, the ideas that were brought. If you missed any of our guests, here's a chance to peek into what they had to share. 


Everytime I host the refashion month series, I make a personal plan of refashioning at least one item per week. Once again, I am pretty happy that I have achieved my goal. I was able to turn 9 old pieces into 7 new ones. 


Onesies were turned into undershirts for my potty trained girl - A cardigan and shorts were made for my niece from the same sort of pieces, only they were original from an adult - My daughter got a new jacket from an old pair of velvet pants - I got myself a new summer top out of an adult's lace shirt and a kid's undershirt - And, my nephew got a new cool pair of shorts from my hubby's unused jeans and scraps from an old bag of mine. Not bad, especially considering I was in bed for nearly a week, right?

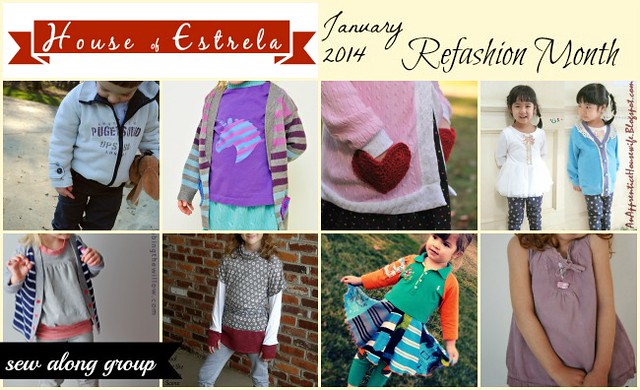
To finish off this wrap up, let's not forget our sew along group of ladies who have also shared their refashions in the flickr froup. 


not on the collage: workpraysew - I'm sorry, I wasn't able to use your photos. 

Labels

About us Acessories Adult Adults Advent Calendar Appliqué Baby Baby Acessories Baby Doll Acessories Baby Doll Sling Baby Shoes Back Warmer Pillow Backpack Bags Barbie Beading Beads Bedsheets Beret Bibs Bikini Blankets Blazer Bleached Blog Tour Blogs Blouse Bolero Book Covers Book Review Boots Bowling Game Boxers Boy Bracelet Bralette Breastfeeding Pillows Briefs Button Shirt Button Up Shirt Cap Cardigan Carnival Causes Cell Phone Stand Challenge Create Charger Support Chevron Christmas Clutch Coats Commitments Constant Change Contests cookies Corset Cose+ Costumes Cowl CraftingCon Crochet Crossstitching Cushions Dance Outfit dashiki Dia de Los Muertos Diaper Pouch Doll Clothes Dolls Drawstring Bags Dreamcatcher Dress Duvet Cover e-book E-Zine Review Easter Embroidery EnglishPaperPiecing Fabric Baskets Fabric Chess Game Fabric dolls Fabric Flowers Fabric Games Fabric Memory Games Fabric Printing Fabric Stash Fabric Three in a Row Game Fabric Toys Features Felt Flamenco Dress Flamenco pants Food Free PDF Pattern Fun Cakes Funny Fur Gifts Girl Giveaway Glasses Case Granny Squares Guest Posting Hair Clips Hair Clips Hanger Halloween Hand Warmer Pillows handbag Handmade Cards Harem Headband Henley Highlow Home Homemade Liquid Soap Hoodie How to Inspiration Jackets Japanese Sewing jeans Joggers Jumper KCW Keyring Kid's Choice Series Kid's Crafts Kimono Kleenex Purse Pouch knitting Knock it Off Leather lederhosen Leg Warmers Leggings lunchbag Maratón Telaria MashUp Series Maternity MeMadeMay; Men Mending Challenge Mini-Sofa Cover Mobile Mobile bag Mom's Monthly Wrap Up Needle Rolls Nightgown No Sew Nursery One Thimble Onesies Operation: Project 0$ Other Crafts Ottobre Overalls Pajamas Pants Paper Crafts Party Favours Party Time Patchwork Pattern Pattern Testing Pattern Tour Pear Puff Seat Pencil Case Pencil Rolls Peplum Peques de Cine Peter Pan Collar Pijamas Pillow Covers Pillows Piñata Cake Pinterest Challenge Pipe Cleaner Crafts Placket Pockets Plastic bags Dispenser Pleats Pocket Slings Podcast Pompoms Pouch Practising ´n Improving Project Run and Play Project Sewn Projects Pt Refashion Week Quilting Recipes Recycled Ribbon Organizer Recycling Refashion Month 2012 Refashion Month 2013 Refashion Month 2014 Refashion Month 2014 (2) Refashion Month 2015 Refashion Month 2016 Refashion Runway Refashioning Retro Reverse applique Reviews Ribbon Roses Robe Romper Romper Dress Romper Week Roots Round up Rucksack Saving Series Saving while Sewing Savings Made By Sewing Scarf ScrapsBusting Sequins Sew 20's Sew Along Sew Geeky Sew In Tune Sew-a-bration of Womanhood Sew-vivor Sewing Tips Shirt Shorts Skirt Skort Sleep Sack Slings Slippers Snowflakes & Lace Sock Monkey Socks Stitching Suit Surprise Sweater sweatshirt Swimsuit swimwear T-shirt The Hearties The Sew Off Thrift shopping Tights Tips Tissue Case Toddler Top Top 12 of 2012 Top 5 of 2013 Top 5 of 2014 TOP 5 of 2015 top 5 of 2017 Top Stitchers Trousers TSNEM Tunic Tutorial Tutu underpants Underwear Upcycling Vest Videos Vintage waistbag Wallet When things go wrong WIP Women Wreath Year Wrap Up

Cose +

Cose +
Magazine de Costura em Poruguês