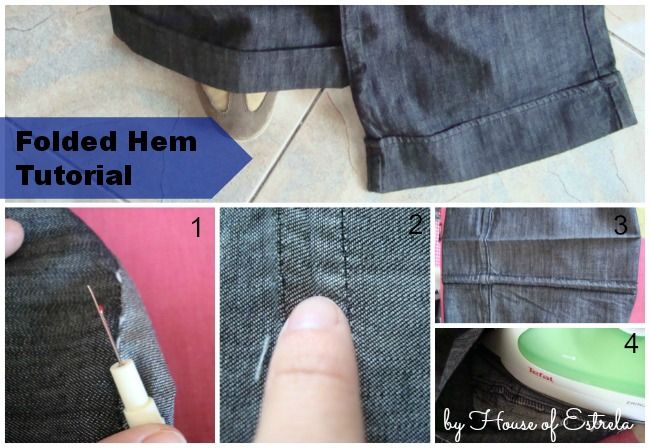
In my previous post, I told you that I made a folded hem on my pants to keep the original look.
This kind of hem is really easy to do and adds a special detail to your finished piece. Today I am going to show you how to do it.
Start by measuring the length you desire your garment to be. I needed to cut about 11cm from mine. Then go unpicking (1) the original hem. You'll be faced with a folded mark (2) and that's from here that we will work. In picture number 3, I am showing you how it looks outside. Press (4) it all flat so you can work better.
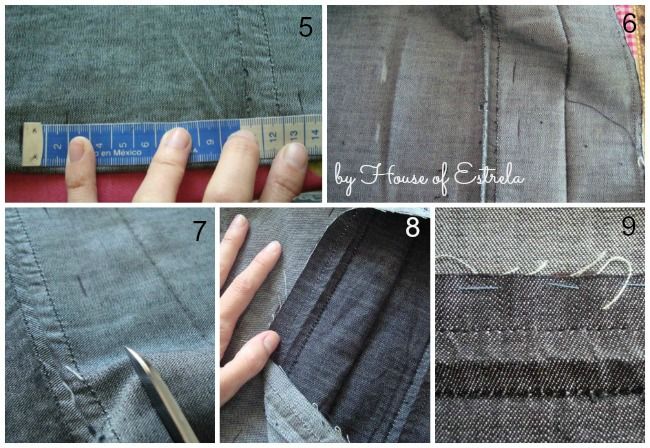
Let's work on the inside of your pants. Measure (5) how much distance from the folded mark (11cm in my image) up to the desires length of your pants. Measure 2cm down the folded mark (6). Then cut on that line (7). Fold your pants to the inside, using the upper line to guide you (8), and do some wide stitches just to keep it in place (9). I usually use pins but I figured it was much easier to do it this way in order to get a better finished look.
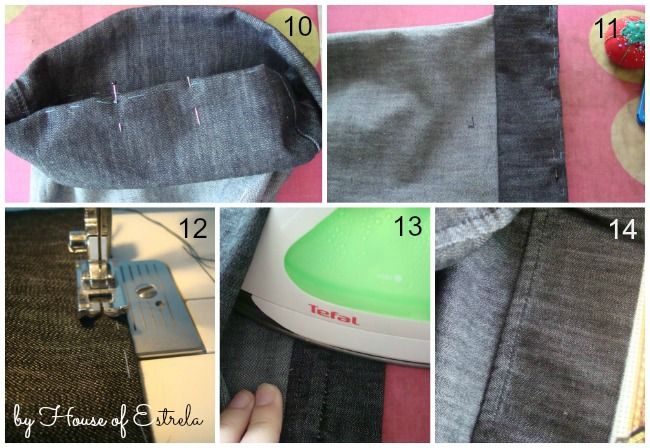
You will fold it again (10/11) and pin it. Sew a straight line using your foot's distance (12), 0,5cm in mine. Then unfold and press your seams on the inside (13). And you're done (14). If there is any step that wasn't really clear, please feel free to contact me and I'll be glad to help.
A while ago I have done a different folded hem tutorial. I wrote it in portuguese only though, in my other blog. Here's a link just in case you want to look at the pictures. Hopefully I'll get around to share that here too.


Great tutorial! Seems like an quick easy way to hem!
ReplyDeleteThanks for linking up!