
If you're looking for the giveaway, please click HERE.
A couple of months ago I made these two onesies for my baby boy. You can read more about them by clicking each photo.


They were both refashions from t-shirts, and ever since I made them, I've been wanting to share a tutorial. But not only a tutorial, you can have a FREE pattern, the one I drafted for my own. If you are expecting a baby, or have someone close to you that is, this would make a great gift, so go ahead, grab the PATTERN, print it and let's start sewing.
Note before you start:
- Some pattern pieces need to be taped together. In order to do that, you have to match the number on the pattern and letters A to B. Example: piece 4A to piece 4B. Tape them matching the symbols on both pieces.
- I didn't realise it, but I've added two star pattern pieces, but just one is enough, of course. It is an optional add.
- All seams are 1/4" except for sleeves hem, which are 1" long. (they are included in the pattern)
- Just one more thing, I've added a pattern piece for the short sleeves and one for the long sleeves option, when cutting your fabric, remember you just need one of the lenghts.
Supplies:
I have used t-shirts for the entire pieces. Even for the knit bias tape (in black). If you choose to add the star appliqué, you will also need just a little bit of fusible interfacing too. You can mix different fabric colours, but try to keep them from soft knit, it is a piece you're making for the delicate skin of a new baby. You will also need snaps.

Cutting:
Start by cutting your pieces (make sure to have the right sides facing up). Information on how many to cut on each piece is on pattern and on the picture above. Besides the pattern pieces, you will need to use two tiny bits of scraps, cut them about 1"x2", fold it lenght wise and use a zig zag stitch all around the edges. You'll have two little squares you'll want to save for later.
Sewing:
- Start by hemming both sleeves. Finish hem edges, then fold 1" towards the inside, press and stitch. This step is not pictured because I used the original hems from the t-shirts. If you're doing the same, remember to cut 1" off of the pattern piece.
- With right sides together (RST) pin shoulders. Finish your seams (with a zigzag stitch/overlock), and press towards the back piece.
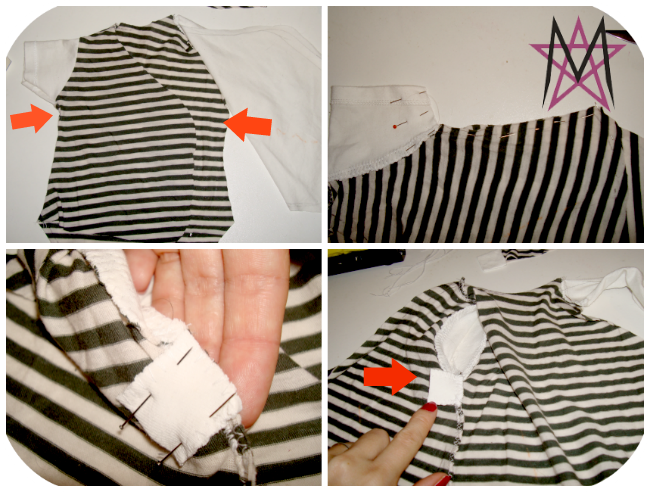
- Place onesie with right side facing up, put sleeve RST and pin the sleeve all around (in case you have any doubts, check the colour/fabric of right and left sleeve in my onesie to check if you're doing it right).
- Sew it and finish your seams. Press towards the sleeve. Do not repeat for the other sleeve (left side) yet.

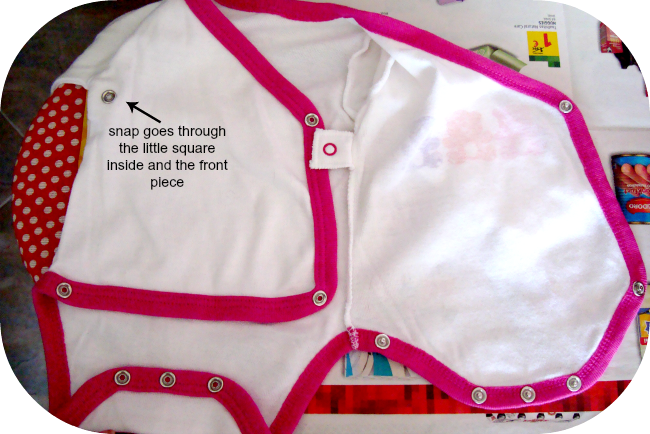
- Use one of those little scrap squares to add to the side seam in the right side of the onesie (first red arrow). When you sew the sides together it should be attached to the front side piece, and will stay in the interior of the onesie when you're done (as seen on the fouth photo below).
- The second arrow on the first photo shows were the other little square will be added, but we'll get there a little later.
- Put RST of the side and pin it from sleeve to bottom. Sew and finish your seams.
- Make sure you have enough bias tape (I used about 44", but I guess it might change a little according to the stretch in your fabrics so the best thing to do is to measure all around your piece to know how much you will need, or just go, with the same measurement I've used and add an extra inch or two to be sure it will be enough.
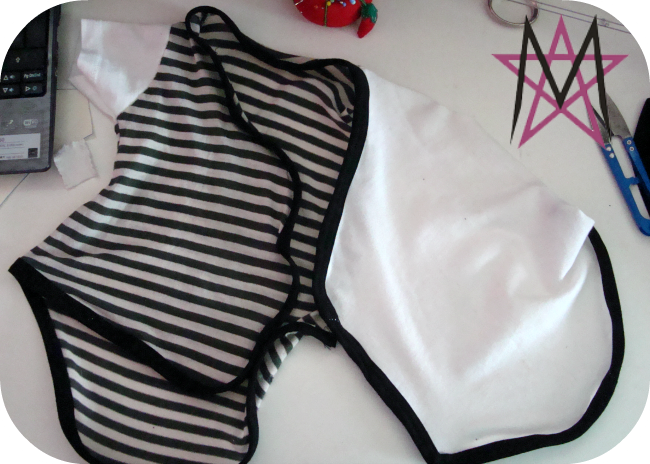
- Start pinning the bias tape right side of bias, facing wrong side of onesie, at the bottom of the front left side seam and go all around until you reach the bottom of the back left side (I hope it is clear in the first photo below).
- Press seams down, turn about 1/4" and then the same again.
- Pin and sew (on the right side) with a double needle or a zigzag stich. Don't pull your fabric while stitching, allow your machine to feed it and just guide it carefully.

- This is how it will look when you're done with this step:
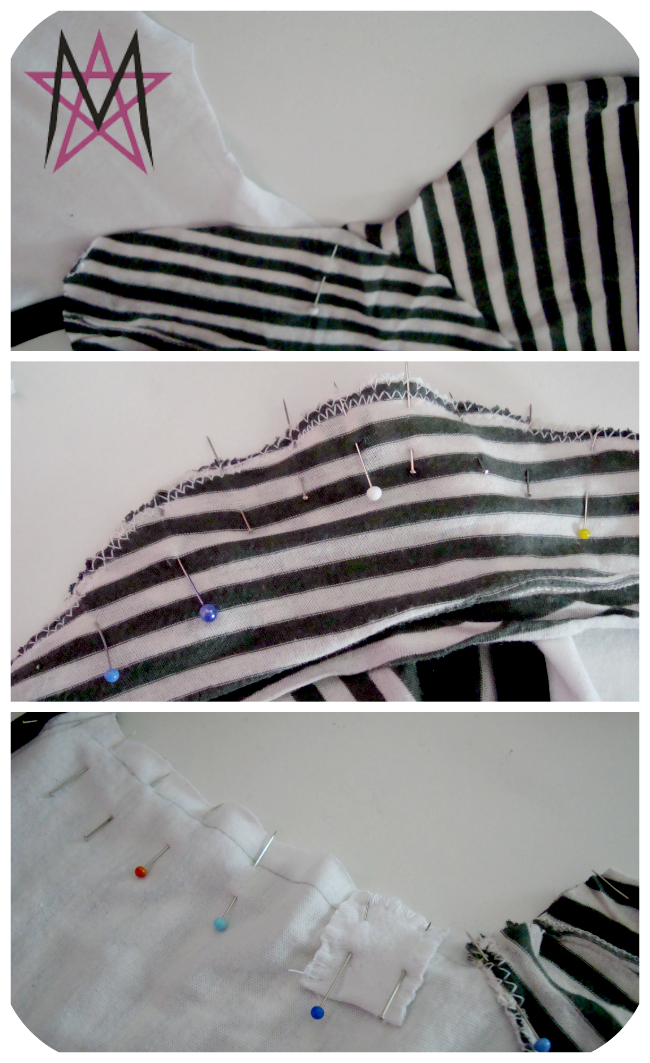
- You can add the other sleeve now, following the same steps you did to attach the first one, and can be seen on the photos below.
- Close the left side seam. Put RST, and remember to add the second square to the seam. Pin, sew and finish seams.
- Your onesie is almost finished. The last step consists in adding snaps. Check on pattern the places you should add them, they are marked with a circle, but you also have this photo here to help you:
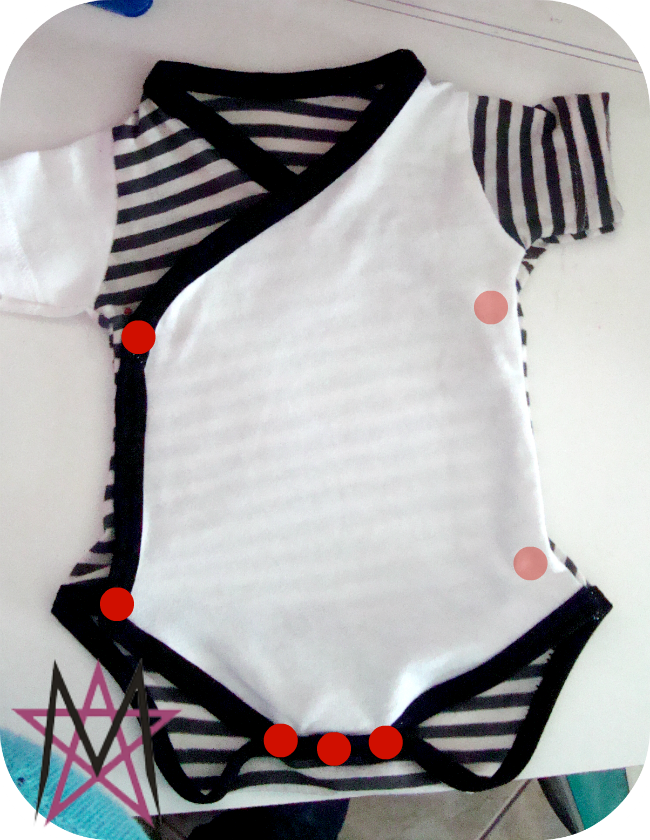
And just a little more help, here's how snaps should be added:
Optional:
- I had just one extra step in my onesie. A problem that turned into garment design, I'd say. When I finished the whole thing, I realised it had two holes in the buttom of the back piece, as arrows below point to. To cover the mess, I've cut a piece from the black t-shirt scraps, used fusible interfacing to make it stiffer, used the star shapped pattern to cut an applique, pinned and stitched it on top of the holes. You can also do it to add style to your onesie, or not. Also you can apllique it in any other place of the onesie if you'd like.

Now put it on your new baby and enjoy your newest creation.


I love this! I added to my monthly feature!
ReplyDeletehttp://seemesew.blogspot.com/
Thank you Shantel!
Deletebrilliant!! so much easier than sticking baby's head through neck holes!! thank you soooo much
ReplyDeleteMagda, this is wonderful! I'm featuring this pattern as my newsletter's free pattern of the week. Thanks for sharing! :) Lisa
ReplyDeleteI have a very basic, possibly silly question: how do I determine the actual measurements of the onesie? And how would I relate that to your pattern? I appreciate any help :)
ReplyDeleteHey Brandi, I am so sorry I am so late answering this. I made this pattern for a new born baby measuring about 50 cm height (about 19.5"). I hope that helps.
Deletehi i would like to try the pattern but I am having a hard time figuring the Piece 4 b (front left side
ReplyDeleteHello. As I said above "Some pattern pieces need to be taped together. In order to do that, you have to match the number on the pattern and letters A to B. Example: piece 4A to piece 4B. Tape them matching the symbols on both pieces. "
DeleteMeaning when you print the pattern, glue piece A to piece B to make a one piece only, which will be your front left side. Hope it helped!