
Lauren from adventures of Lauren, wasn't a total stranger to me, because we were both part from the Refashion Co-op comunity - she's actually one of the editors - but it was only when we competed together at Refashion Runway that I started following her blog and all her creations. During the entire competition, I was amazed at how much creative all my fellow contestants were, and Lauren wasn't an exception. It's a pleasure for me to have her sharing one of her stunning refashions, with a tutorial!
...
I am so excited to apart of the January Refashion Month over at the House of Estrela! I am so excited to share my refashion with you. First off, my name is Lauren and I blog at The Adventures of Lauren. By day I am a scientist studying cancer chemotherapy resistance and during the nights and weekends, I find my creative side with refashioning and sewing.
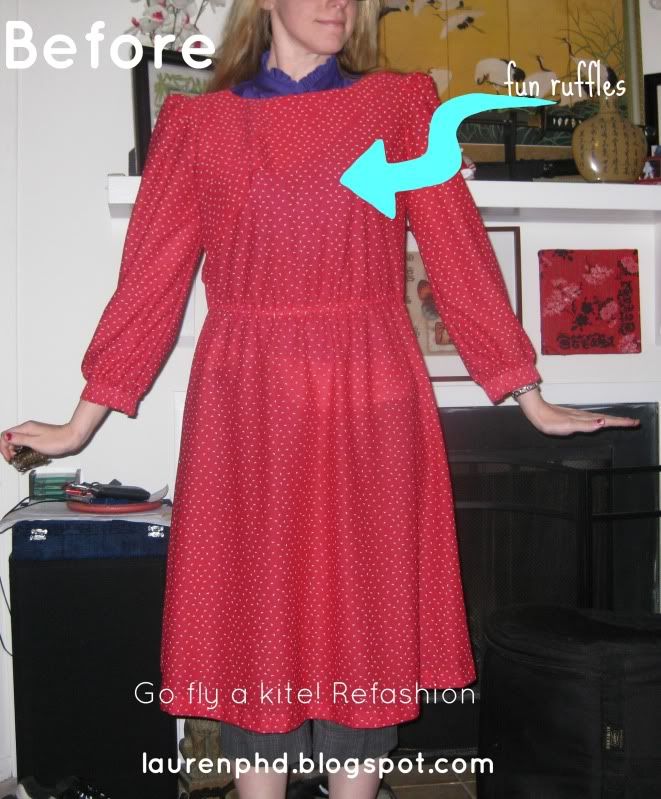
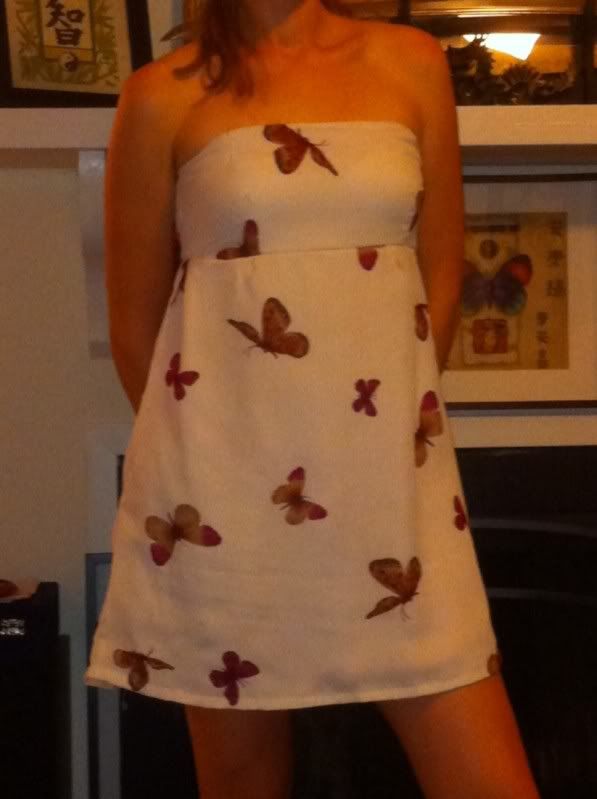
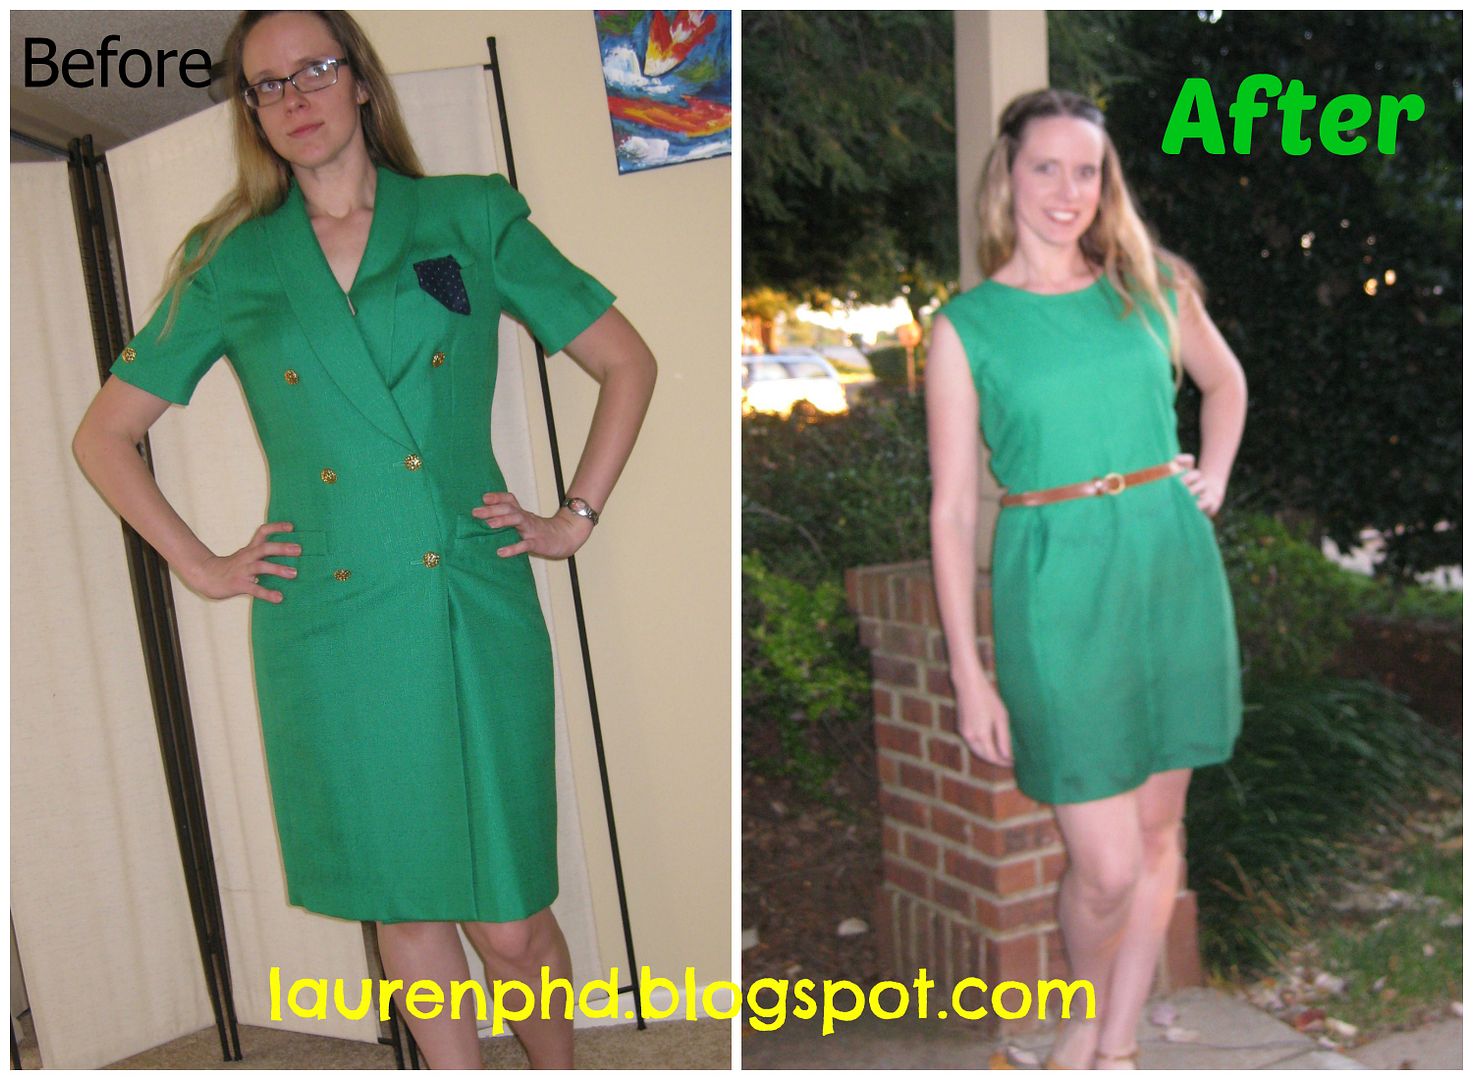
I really enjoy challenging myself. One year while trying to save some money and unleash my creative side, I gave up shopping only to thrift or sew it myself. This year is no exception. I am setting a goal for 99 refashions and again no more shopping just sewing and refashioning! So 2014 will be a fun year! Here are some of my favorite refashions I have done in the past.
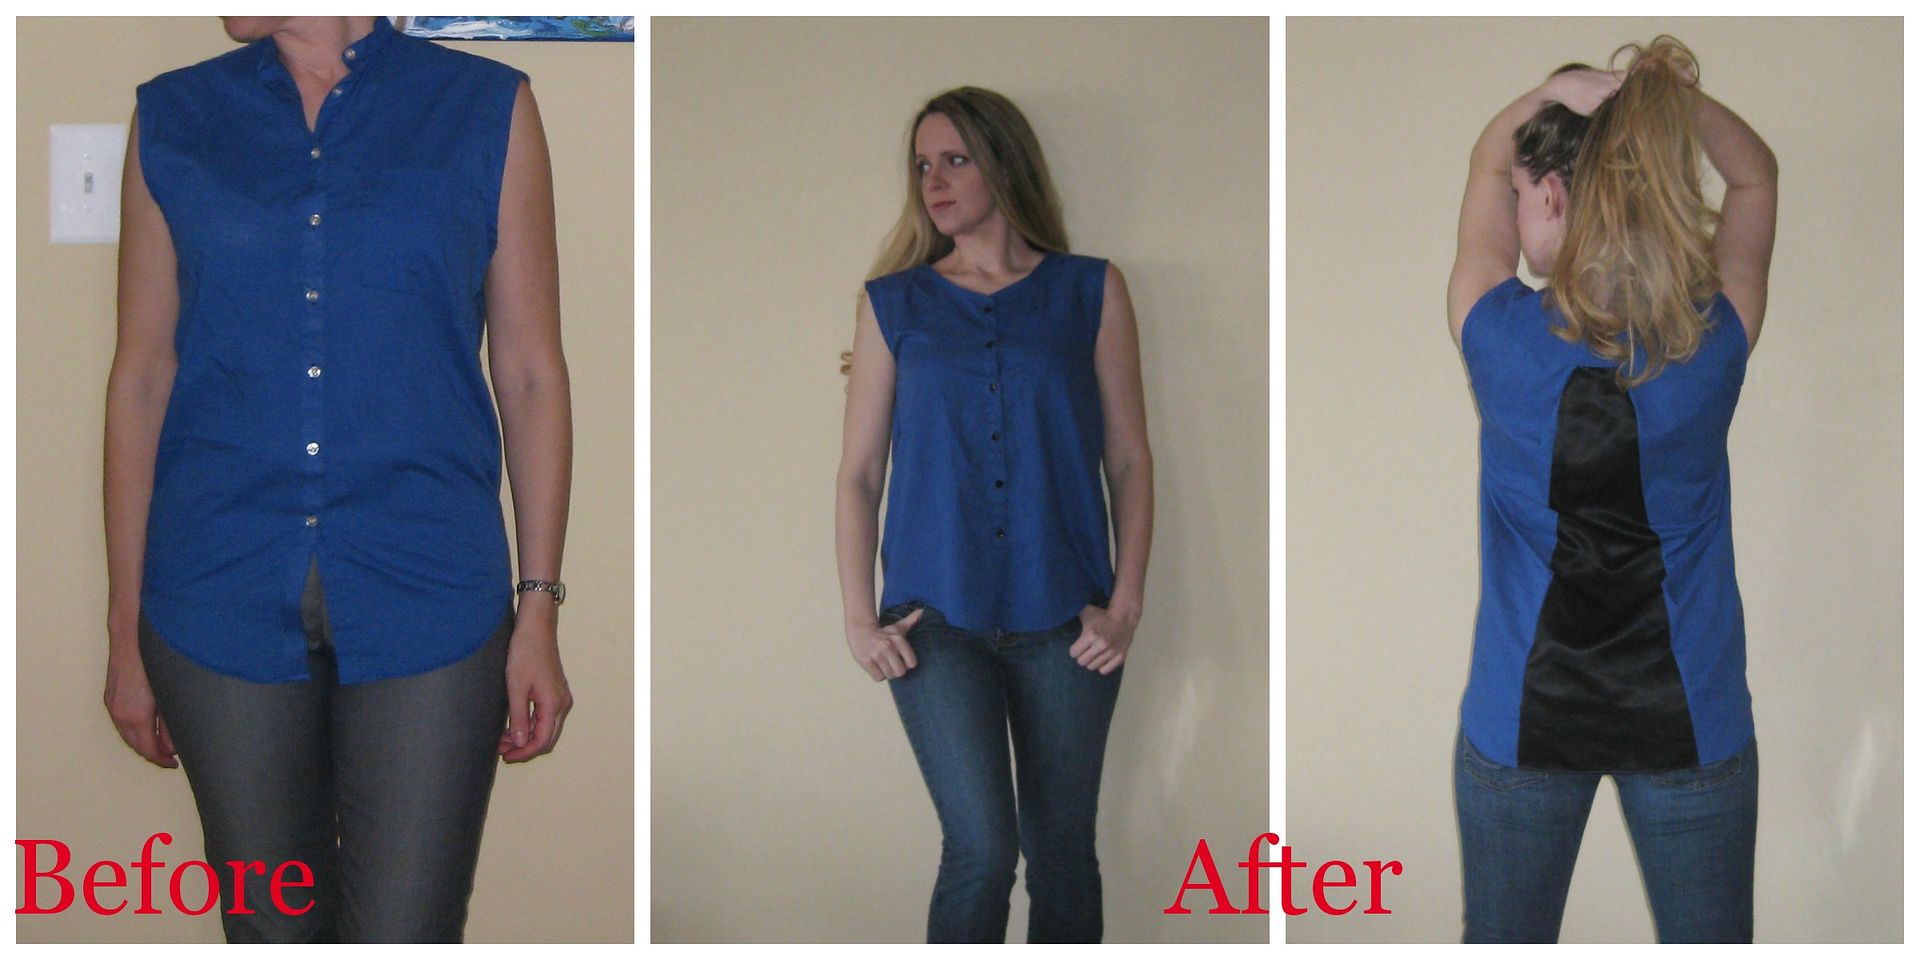
Today I am show what I did with this blue sleeveless button down that I thought I would wear as is. On the hanger it looks great.
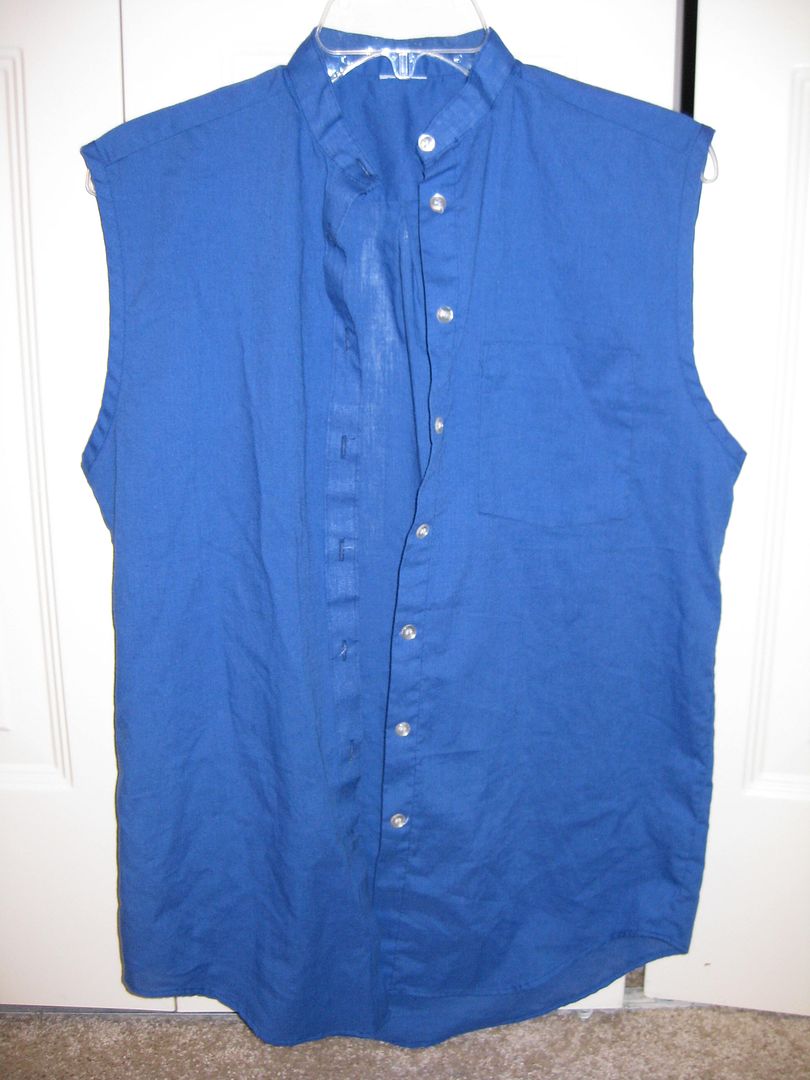
On me not so much....
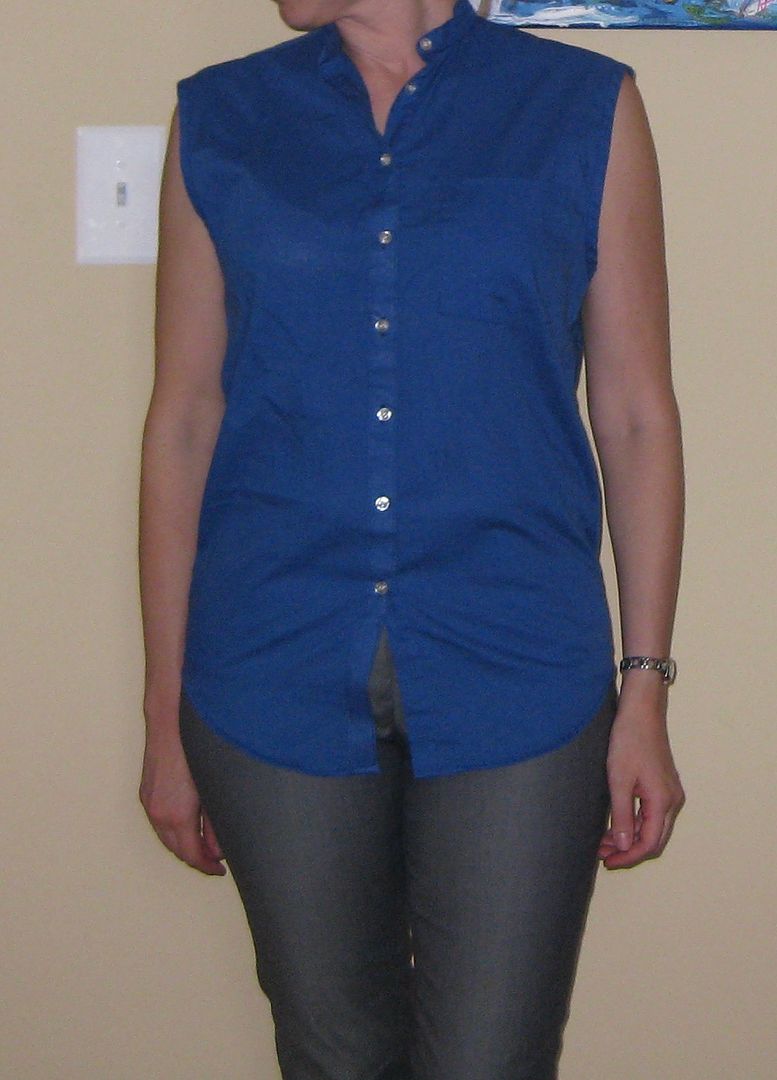
What's wrong? The neck is too small and I can't button it up.
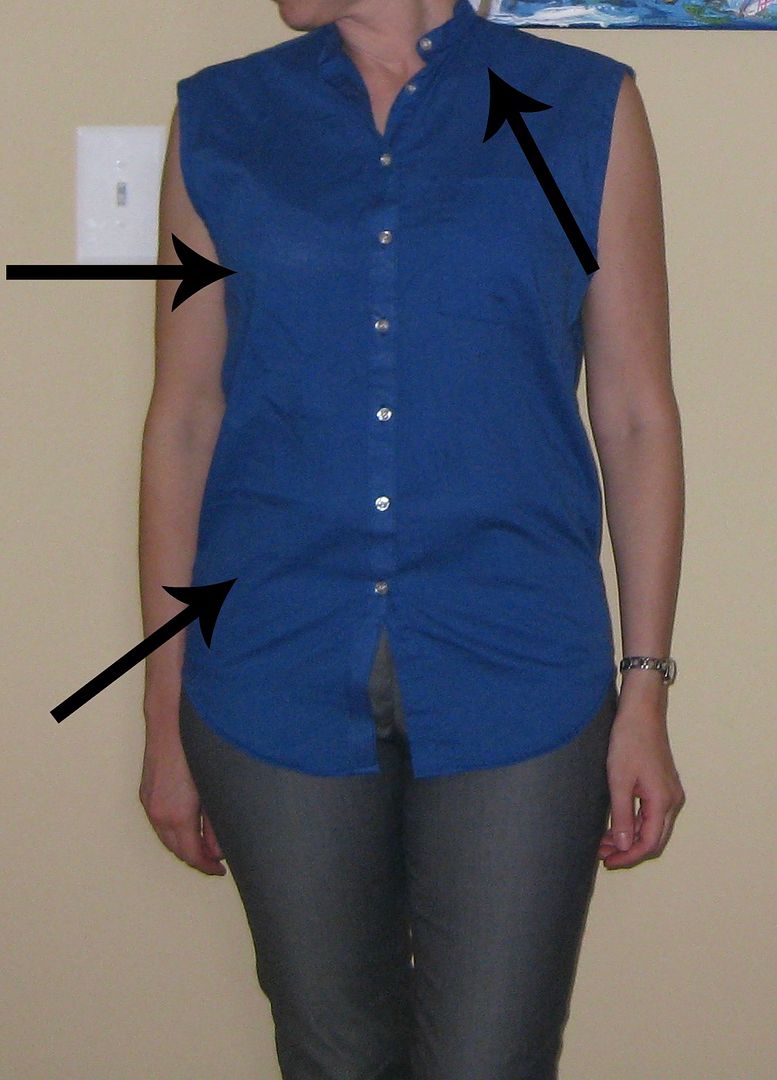
Too tight in the hips.
There is a funny thing going on in the armholes. They are too big. They open up.

So I need to make these arm holes work for me, add some wiggle room, and fix the choking aspect of the neckline. I wanted something different than adding to the sides of the top, I want to add it to the back of the shirt. So away we go!!!
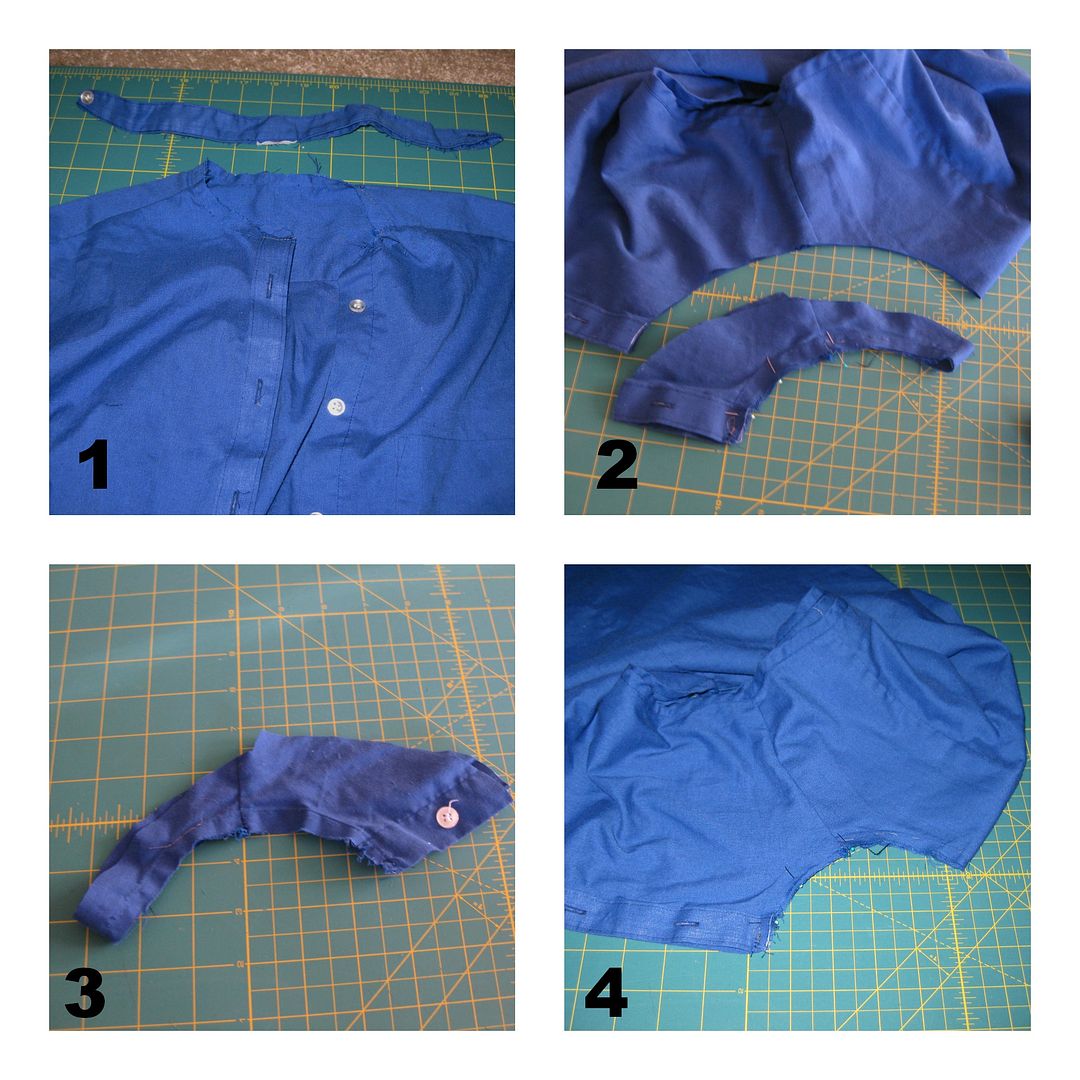
1. Unpick the neck band with my seam ripper.
2. Fold top in half matching up the shoulder seams and cut away a new neckline. I went right below the first button but above the 2nd (#3).
4. Now we have a new neck. We will finish it tomorrow.
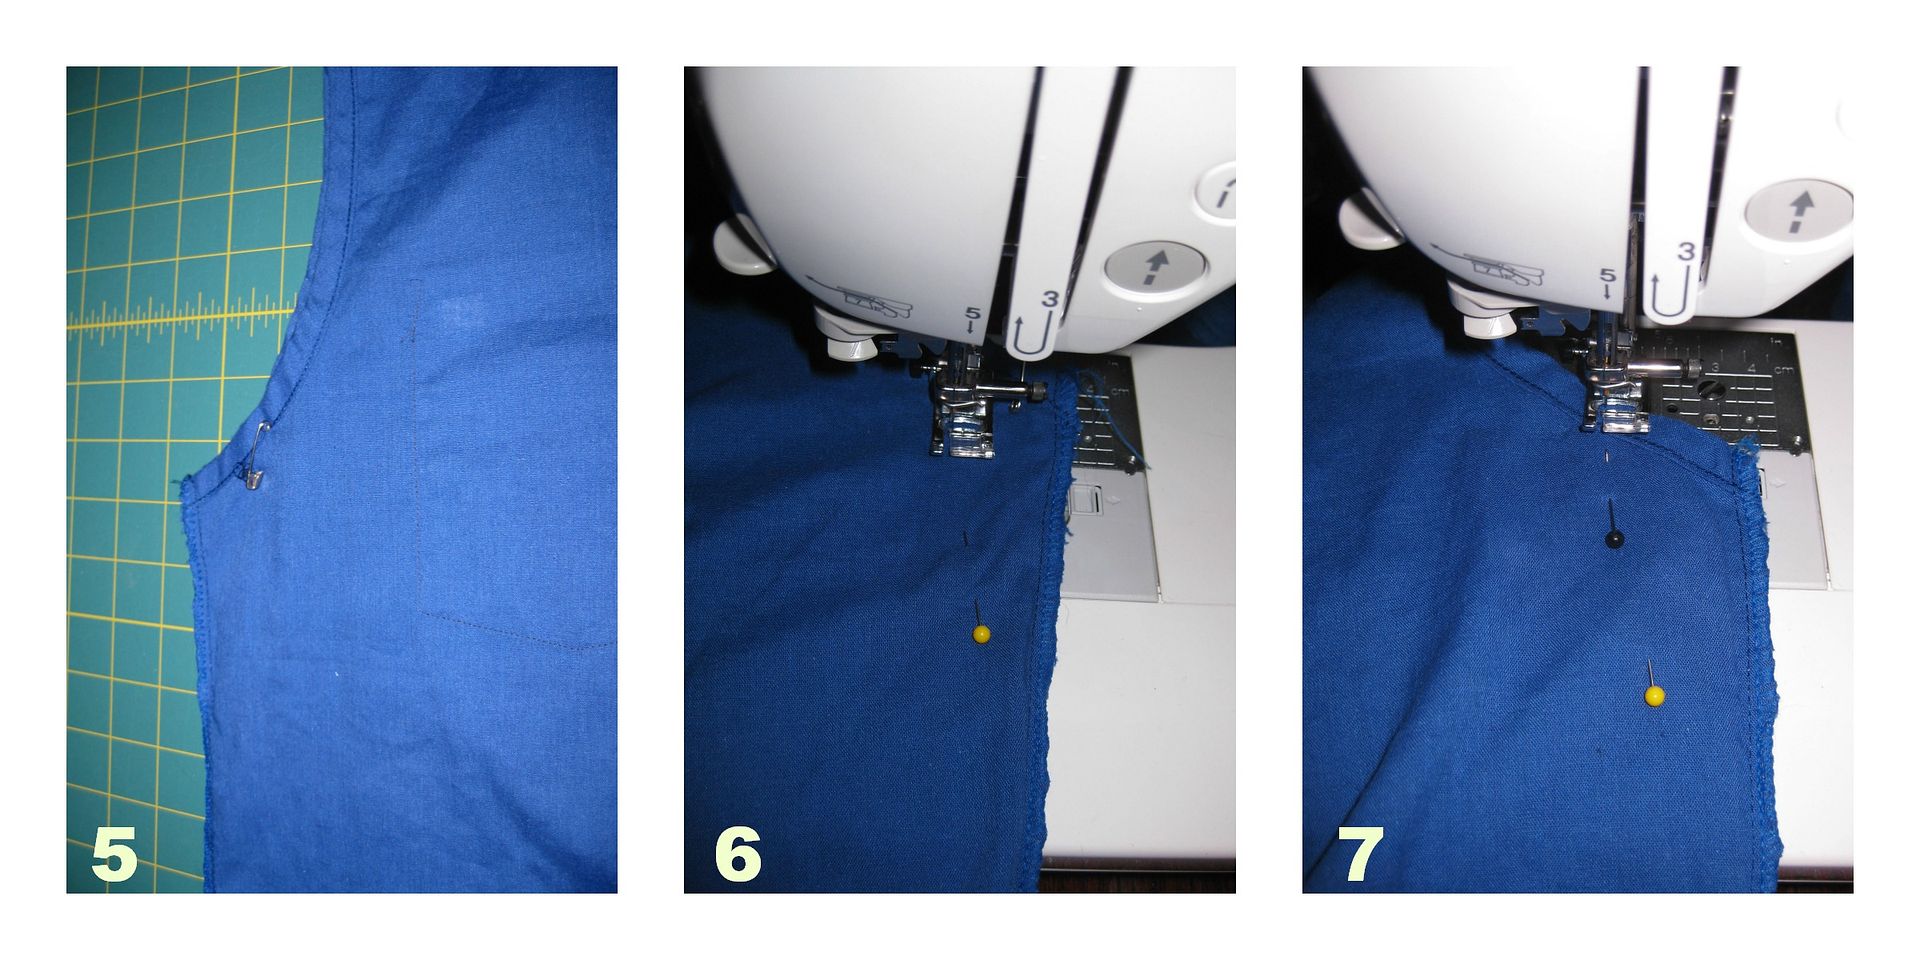
5. Mark the armholes on how much need to be taken in.
6. & 7. Sew making sure each side matches.
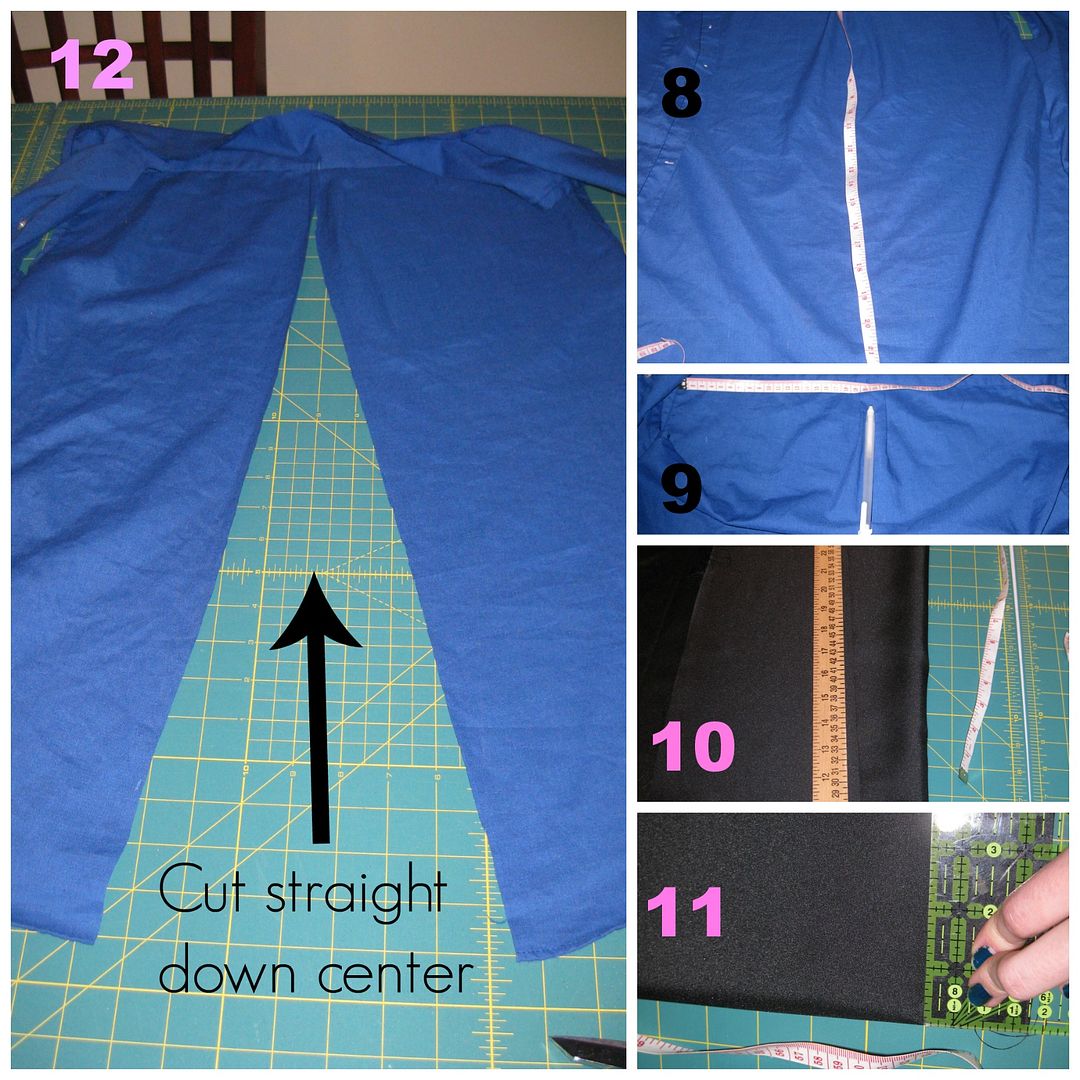
8. Measure how long the back is. Mine was right at 26 inches
9. Mark center of back
10. & 11. With filler fabric, mine was black satin, create a triangle using the length. I folded mine in half to make sure I stayed even. The top was around 3-4 inches across to account for seam allowance.
12. After the triangle was done, inhale & exhale and cut straight down the center back of the top.
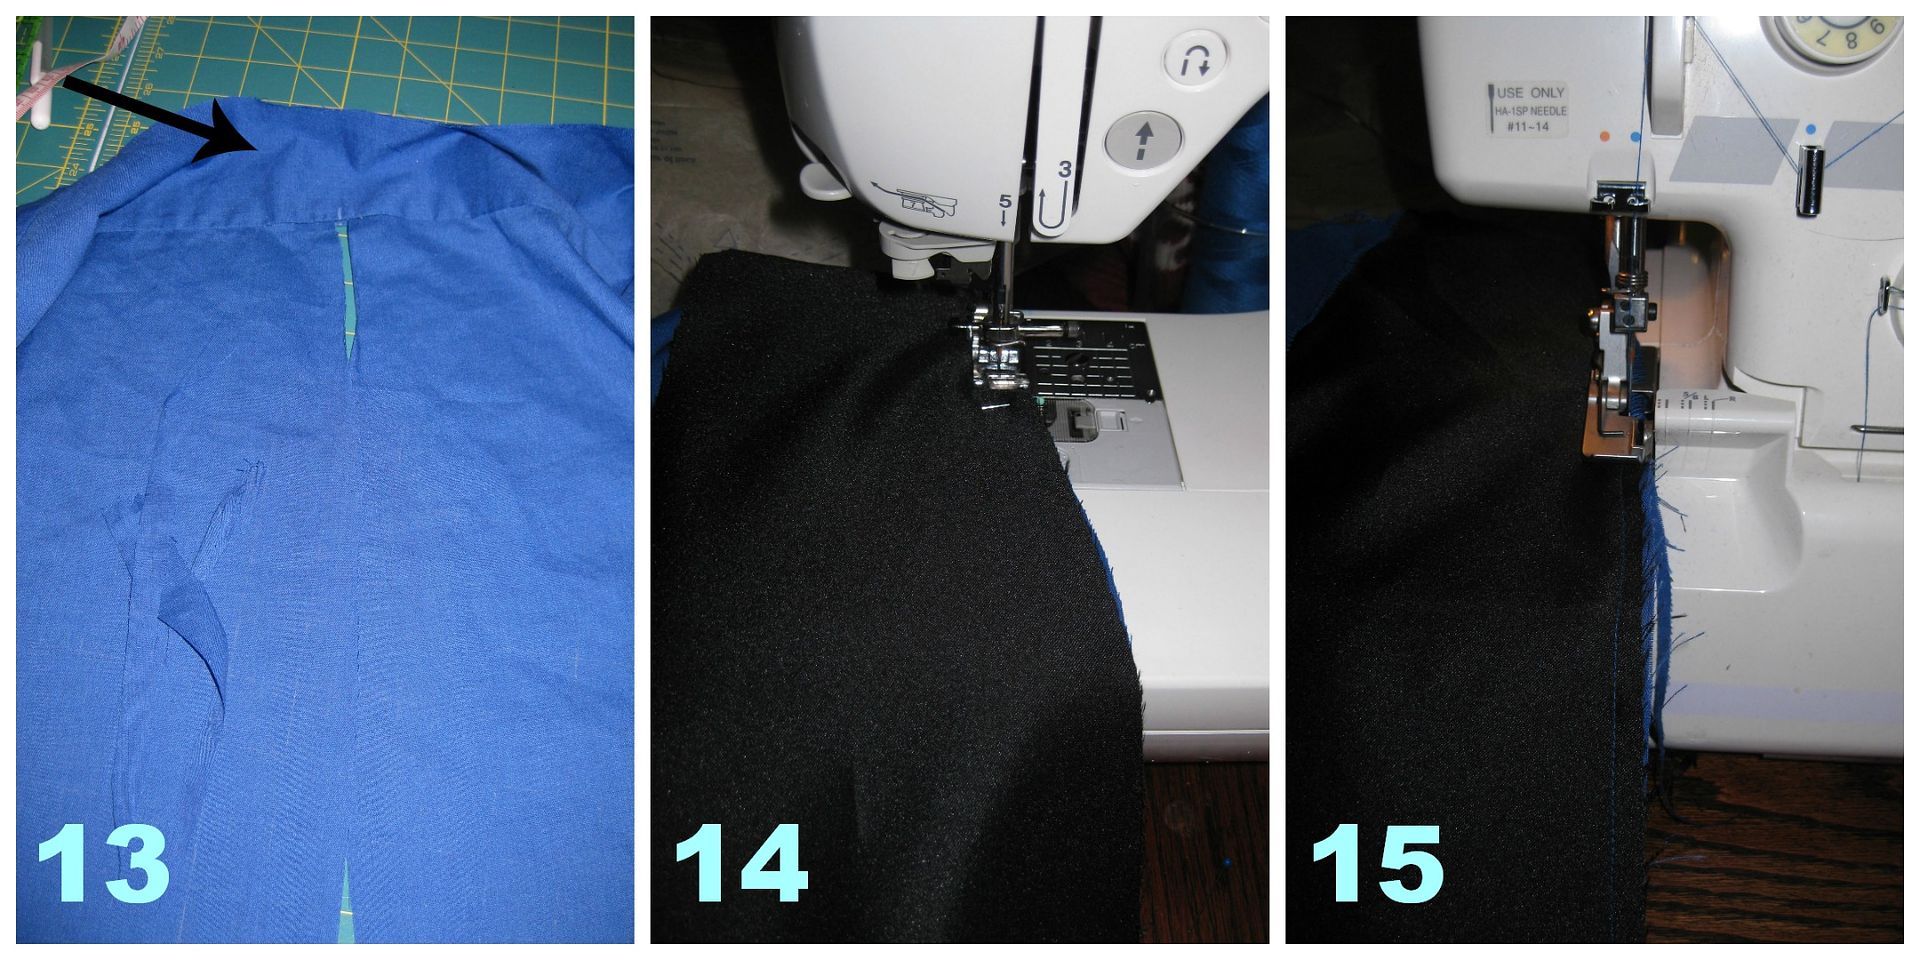
13. Unpick the top part in order to get the fabric out in order to attach the fabric.
14. Match right sides together and sew
15. To clean up, I serged each side. But if you don't have a serger you can do a zigzag or overcast stitch.
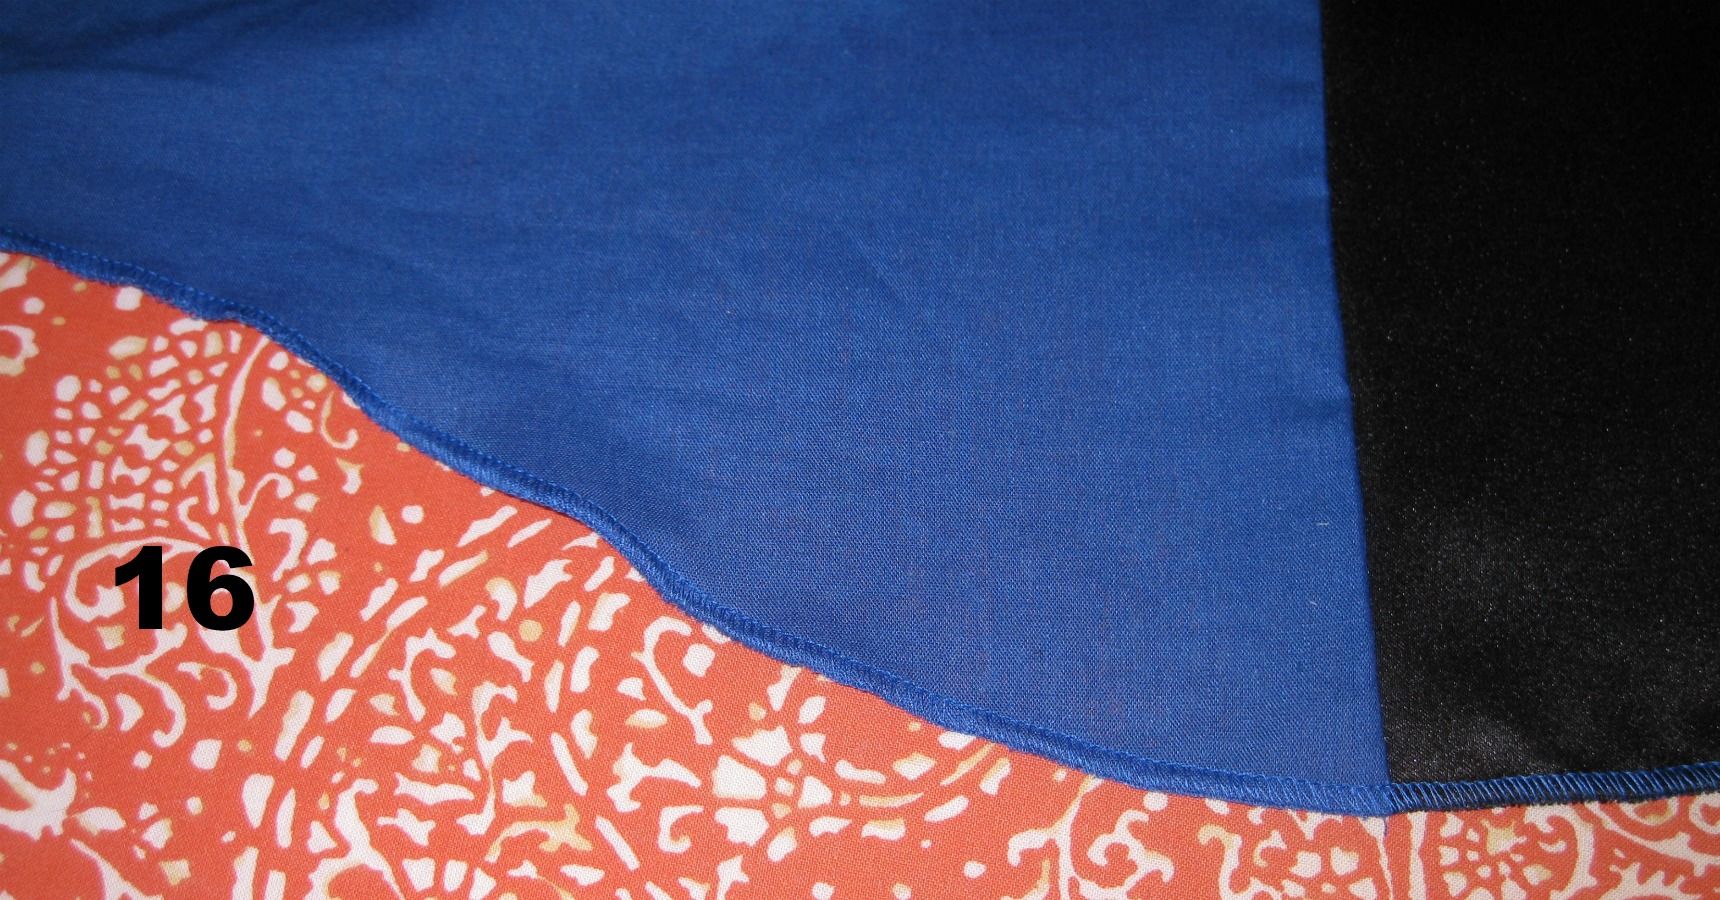
16. Shows the side on how nicely the satin connected to the blue cotton. It also shows the start of my serging of the shirt bottom but my pictures got mixed up and I'll refer to this later.
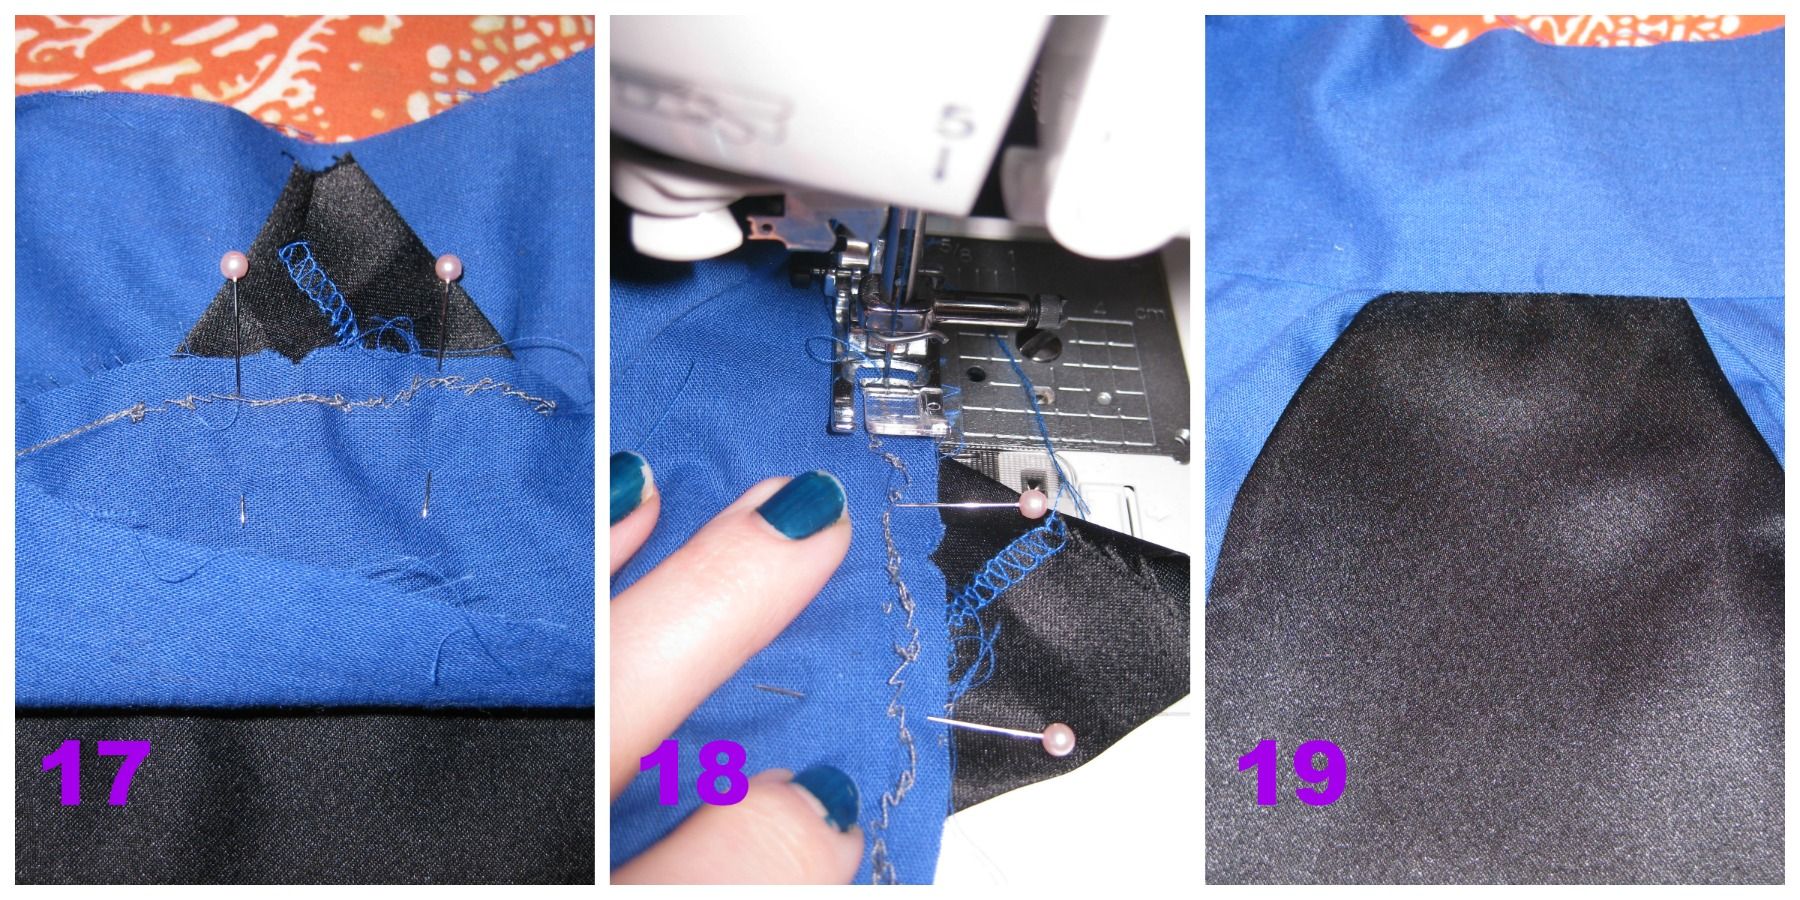
17. Pull the fabric through the top placket that we unpicked earlier to pull out the fabric. Now time to put it back together.
18. Sew
19. Done
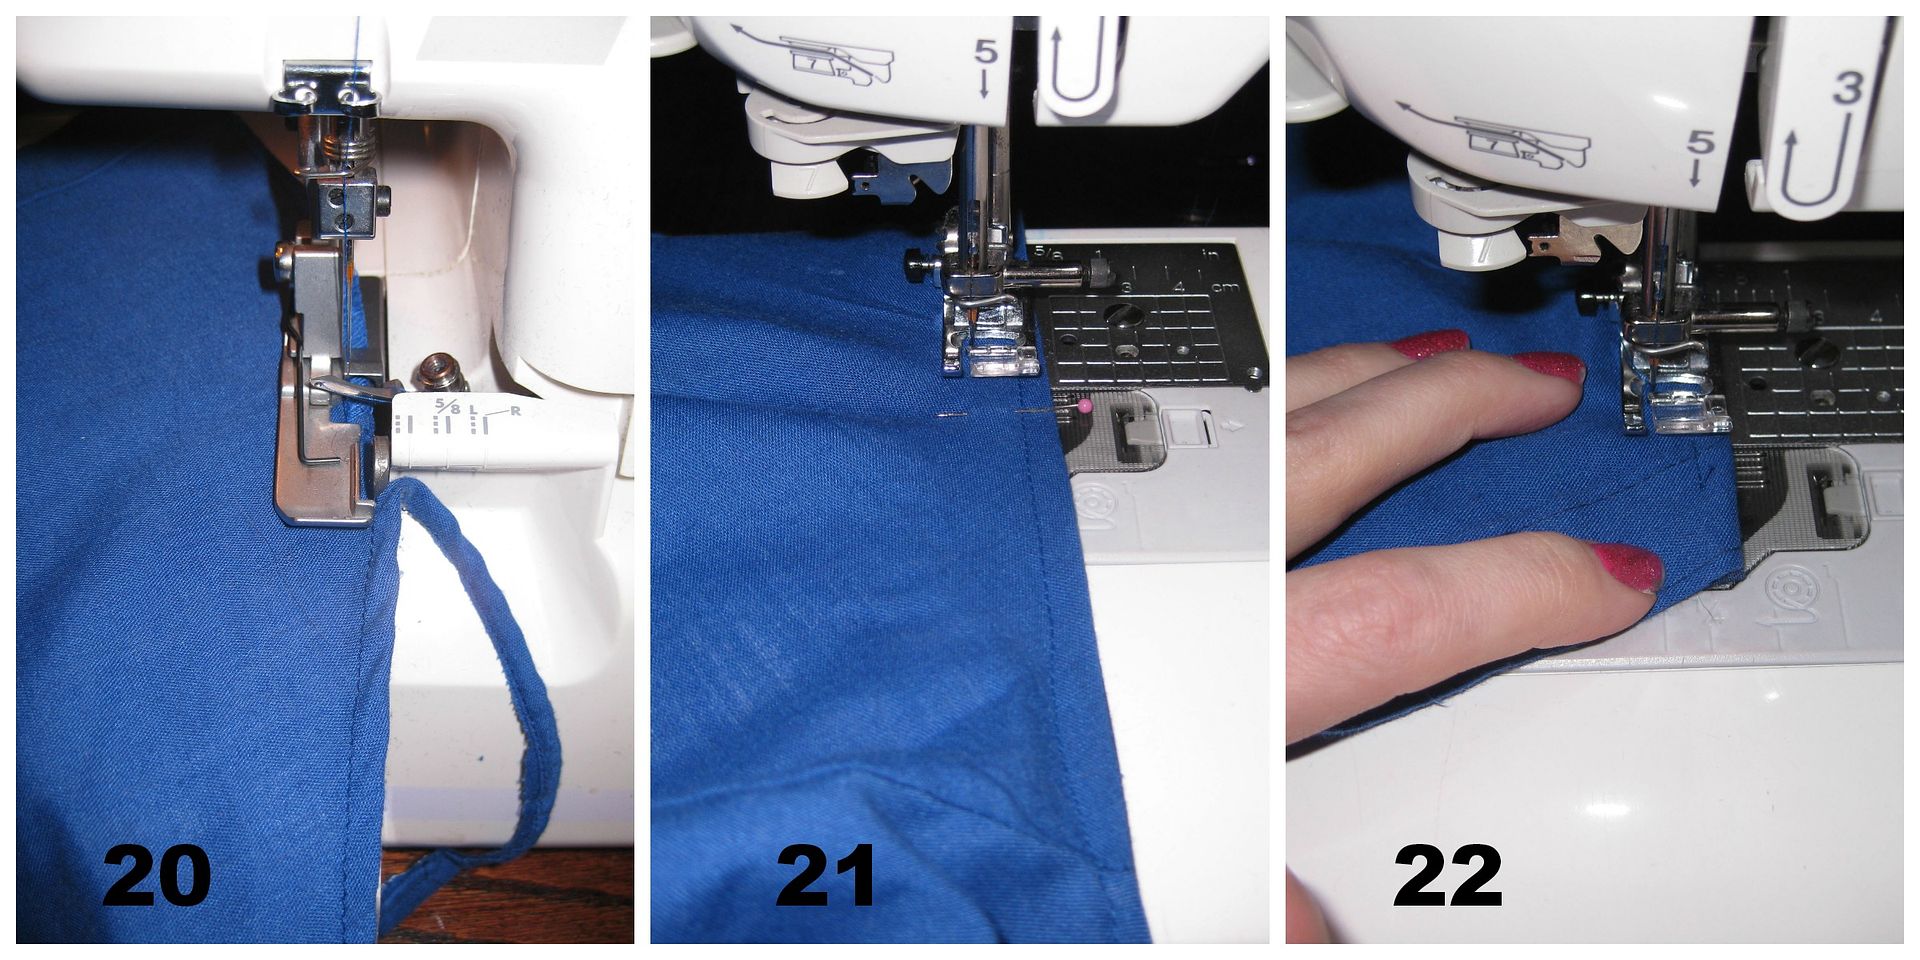
20. Now to fix the bottom hem. I used my serger to cut off the hem. Alternatively you can cut with scissors and do a hem.
21. Refer back to 16 to see what my bottom hem looked like. Fold over and sew (22).
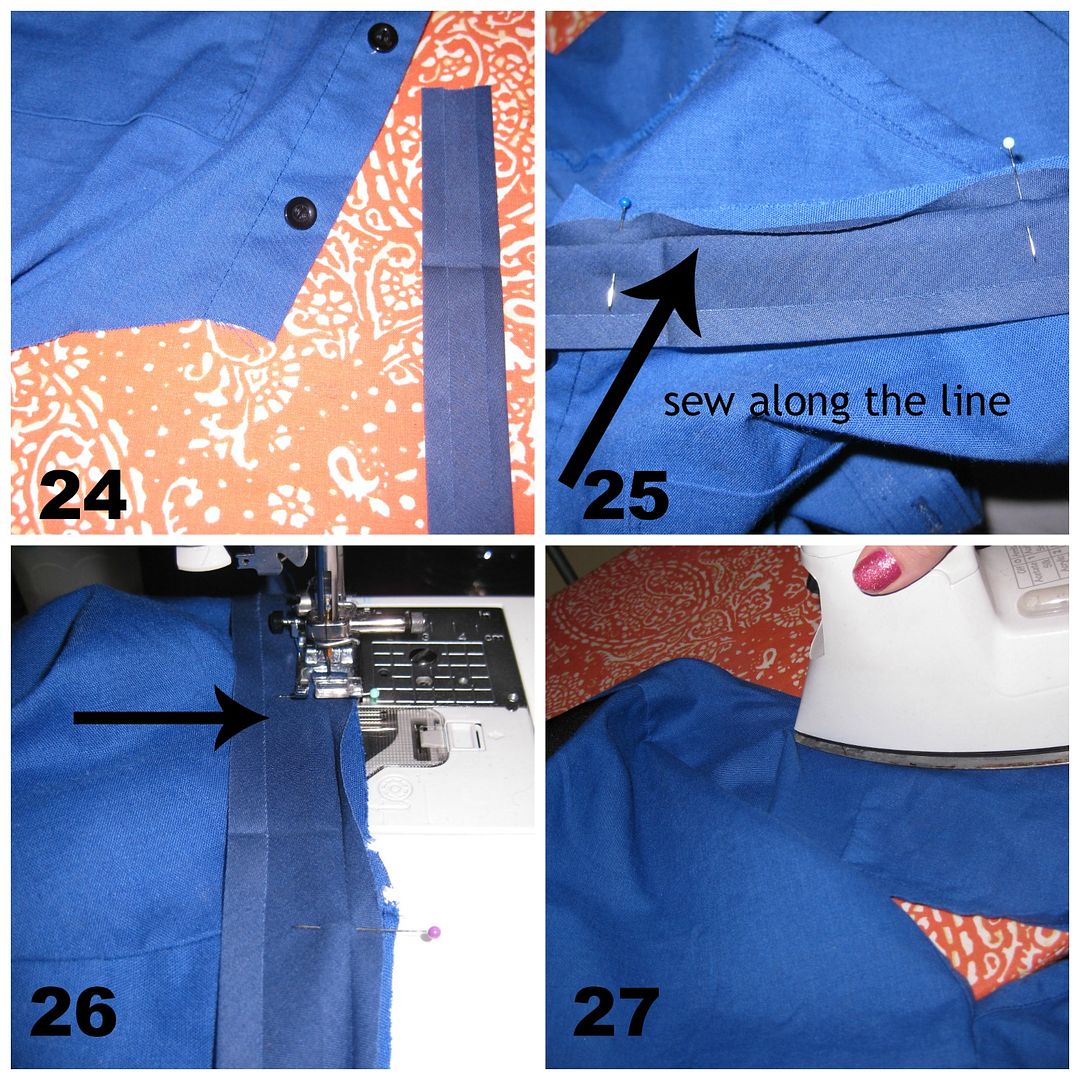
24. Now to finish the neckline. I prefer to use the bias tape method to give a clean edge. Helps me keep my sanity. I found a piece of like colored bias tape, in case of any sort of showing.
25. & 26. Pin the opened bias tape to the right side of the neckline. Sew along the fold.
27. Fold the bias tape to the wrong side and iron. You should see nice curves. The heat will help you achieve the curves.
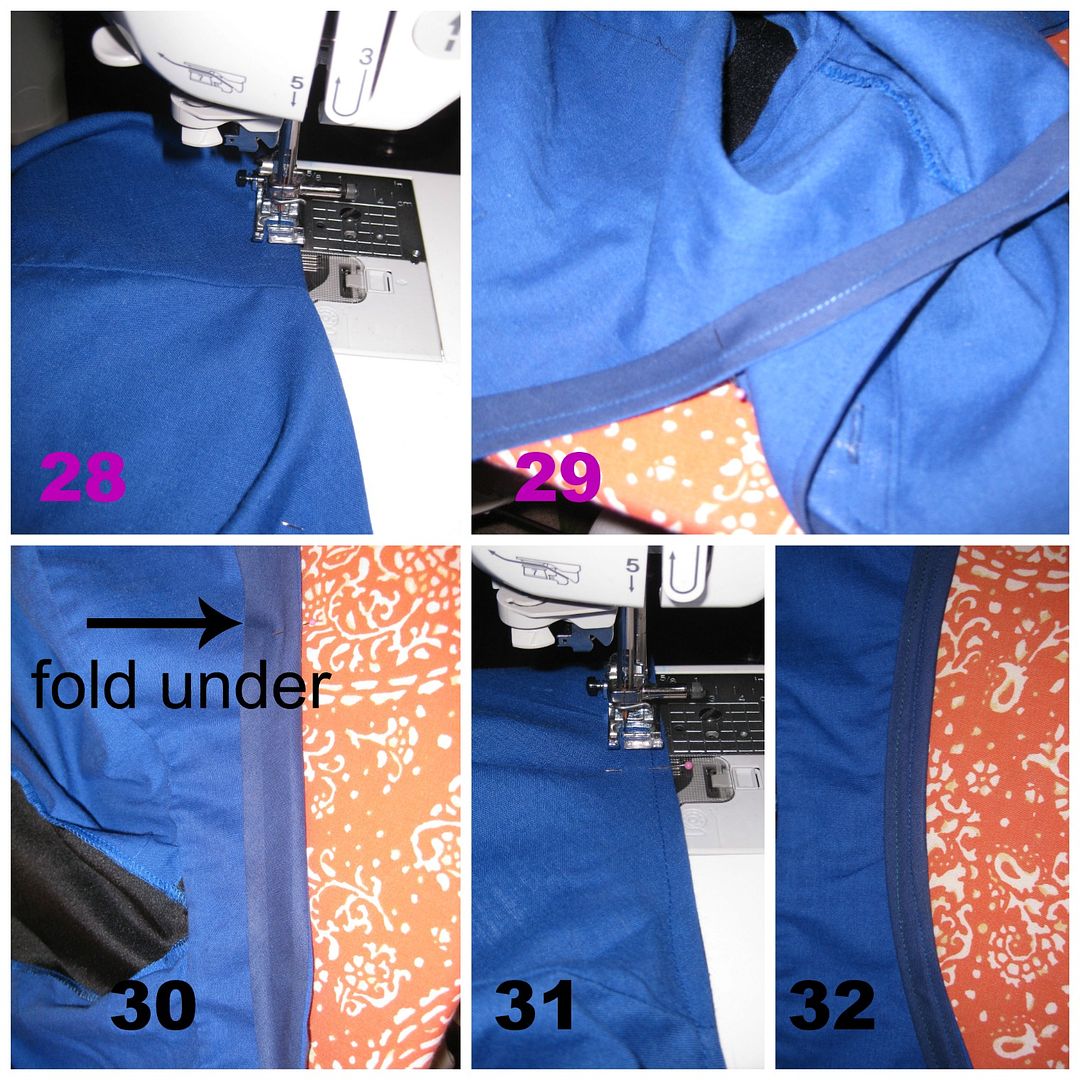
28. Top stitch the neckline. You will grab the bias tape. See 29.
30. Now this was longer than usual so I folded under (on the wrong side of fabric).
31. Resew the neckline again. A little farther away. Normally I don't use extra wide bias tape, this instance I needed to accommodate the extra width.
32. Done. We have double lines.
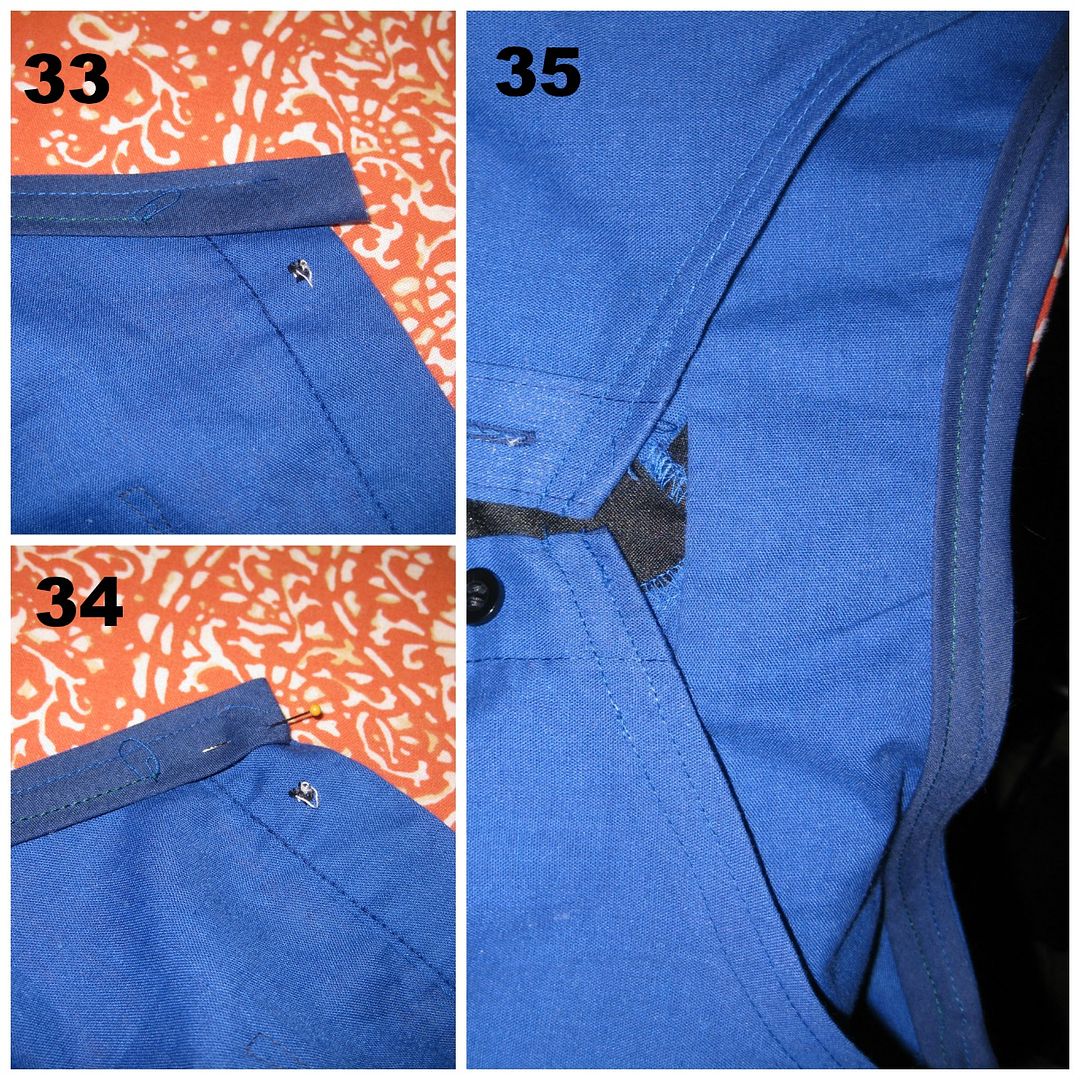
33. I always save the ends for last. Fold the bias tape under
34. Pin and sew
35. Done. Nice clean edge.
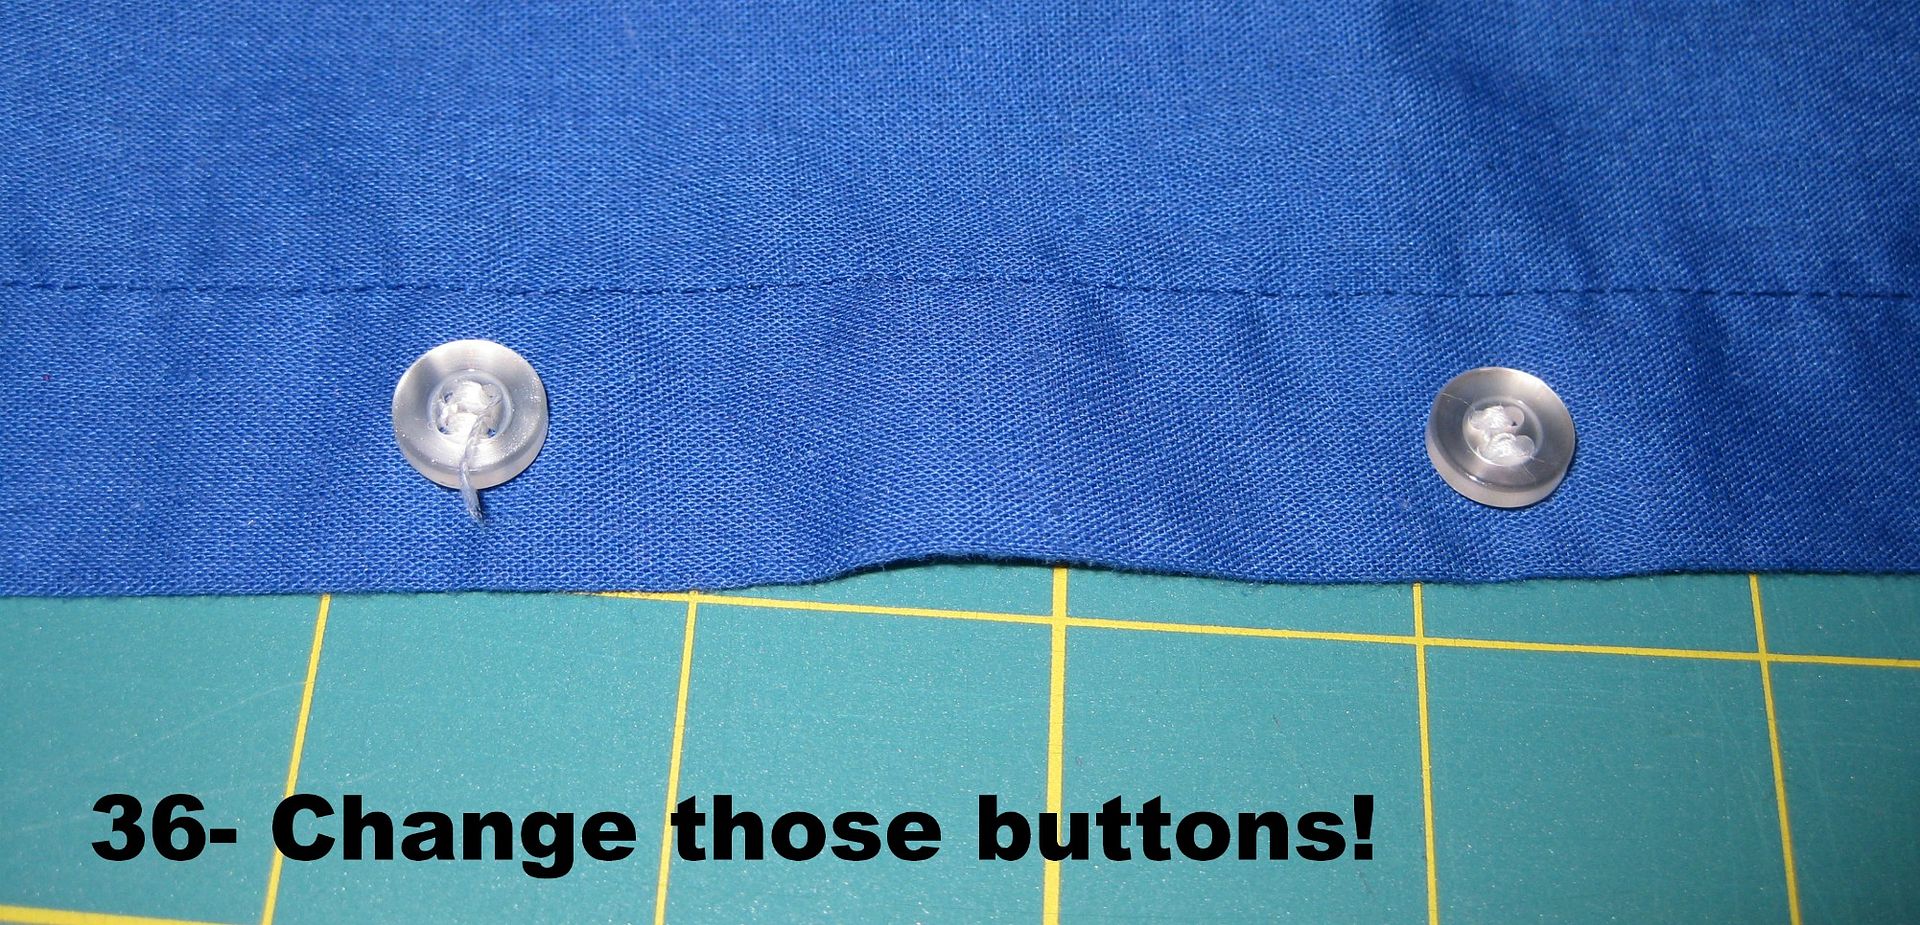
36. Last but not least I did not like the white buttons now that I have a black stripe down the back. I took them off and replaced with black buttons. See 24 for what they look like.
Done! Now I have a shirt that fits me. Something casual to go run errands in.

No more neck hazards here... And fits the hips


Hey check out those arm holes.

Now for the surprise in the back.
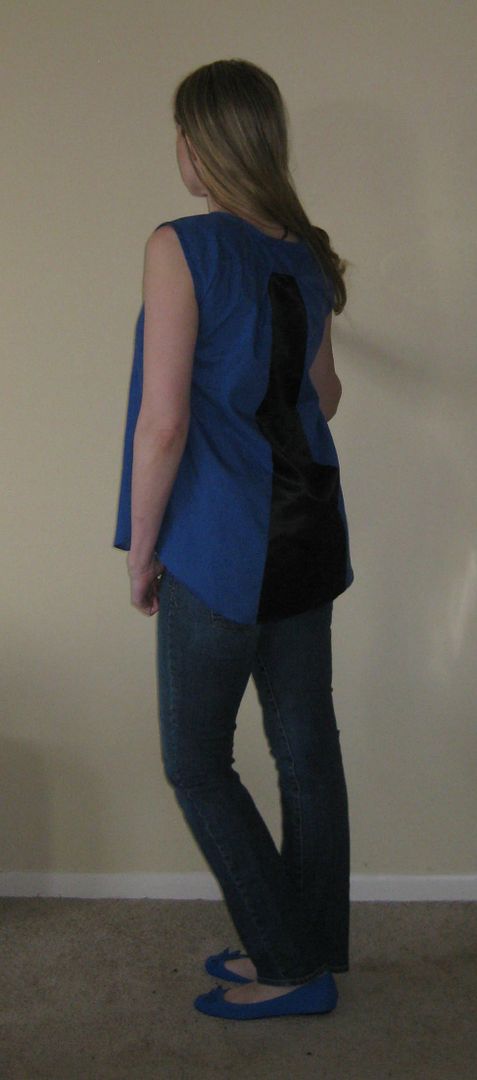
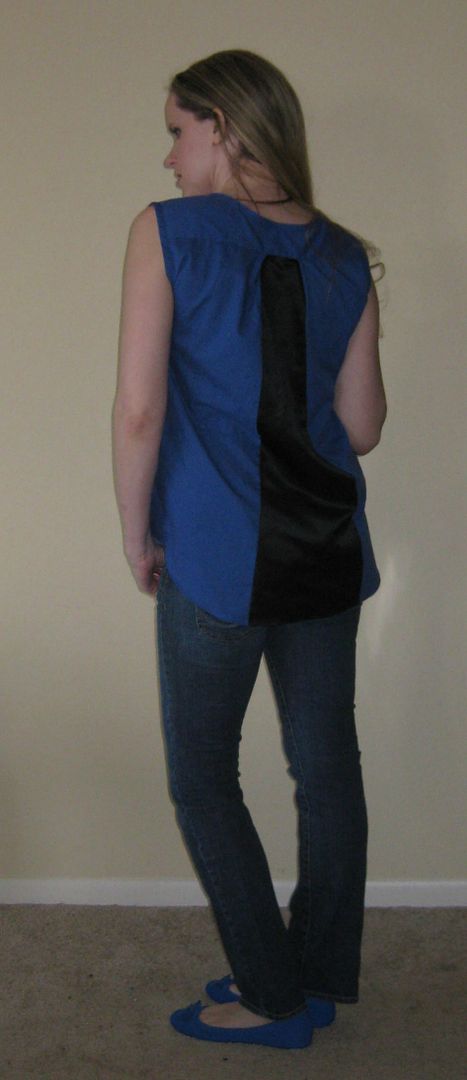
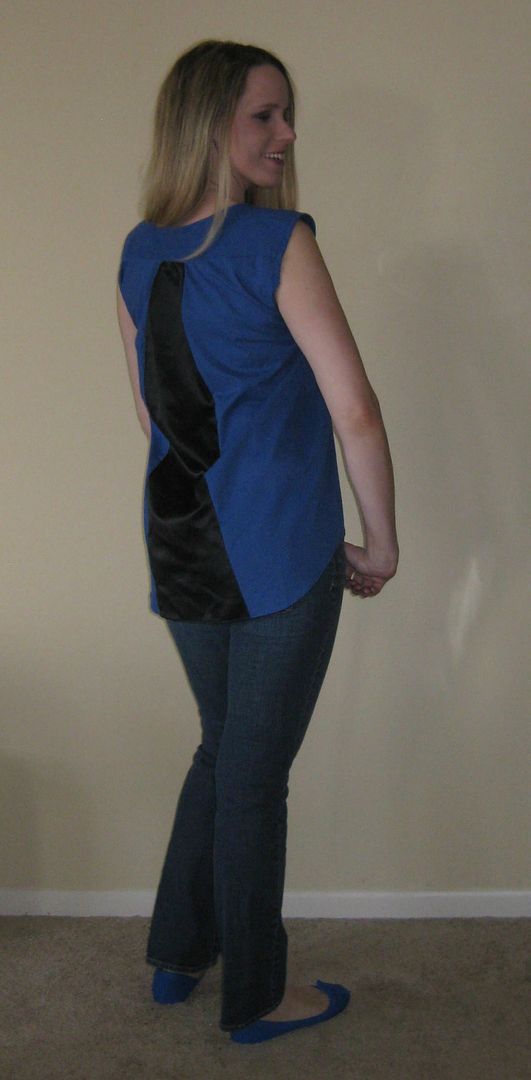
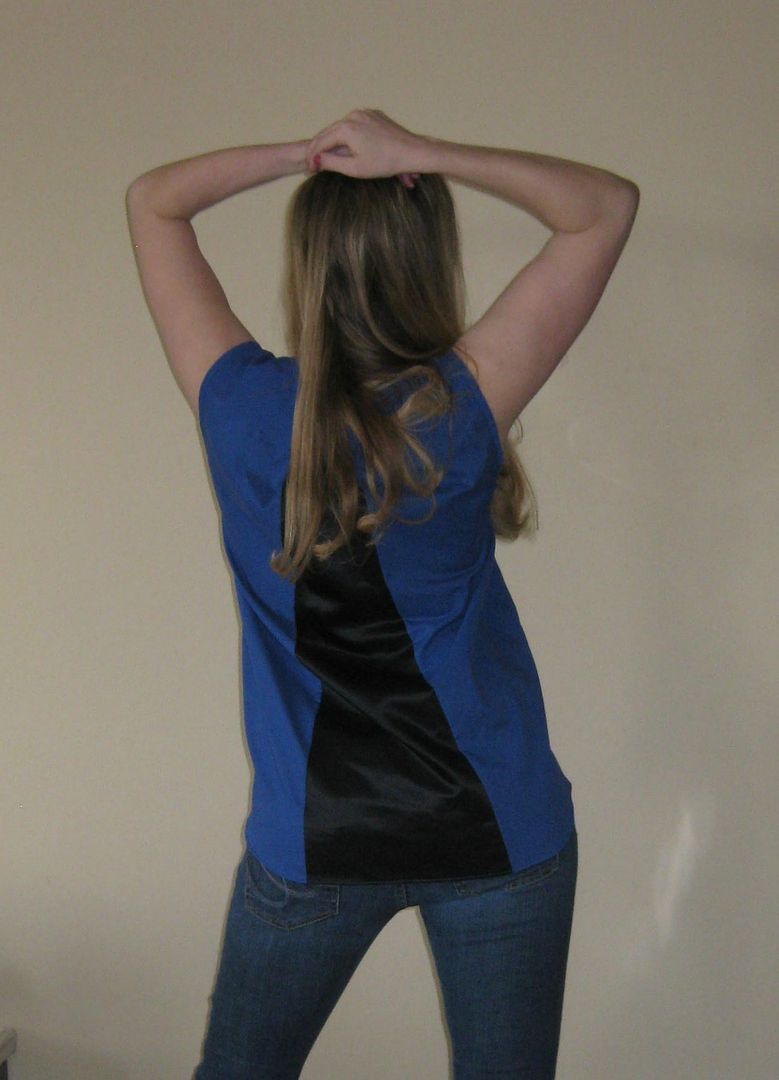
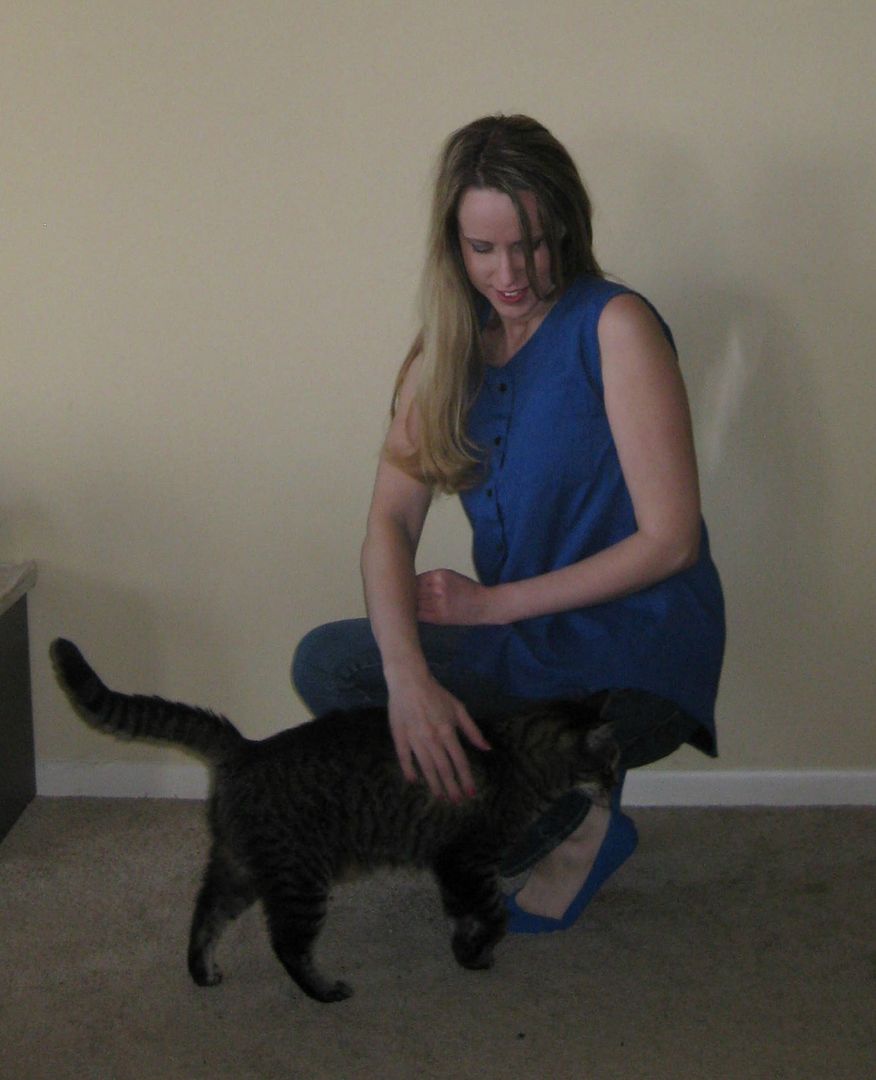
Now for the obligatory cat picture b/c my cats love attention. But it also showcases the fact I have more wiggle room to move with my shirt now.
Hope you enjoyed my little tutorial. I am honored to be a part of this series! Thank you Magda for having me!
Cheers,
Lauren


Lauren! This top is so, so cute. I love it, and I'm now inspired to make one of my own. You have such great ideas!
ReplyDeleteMagda, I love your blog's new look. Great job!
ReplyDeleteA great refashion and a very detailed tutorial!
ReplyDeleteThanks for the tutorial. I love the cool slash and spread detail and new panel in the back.
ReplyDeleteAmazing refashion! I love the new top! And thank you so much for the tutorial.
ReplyDeleteGreat job, Lauren! Such a cute, creative way to add some more room!
ReplyDelete